Akai MPD218
$60.99
The Akai MPD218 midi keyboard is the ultimate controller for creating music, offering 16 ultra-sensitive pads, 6 assignable knobs, and intuitive controls for seamless workflow.
Compare
Description
Akai Professional is a renowned brand in the world of music production and live performance. The Akai MPD218 MIDI device is one of their most popular models that have been on the market for some time. This article will delve into the intricacies of the Akai MPD218 MIDI device and what it has to offer.
Design and Features
The Akai MPD218 MIDI device boasts a sleek and modern design that appeals to musicians and producers alike. The device comes in a compact size, making it easy to transport and store. It features 16 thick, velocity-sensitive pads that feel natural to the touch. The pads have RGB backlighting that comes in handy when performing in low-light conditions. The pad banks on the device allow you to switch between sounds and samples, making it easy to navigate through your tracks.
The device has six assignable knobs that enable you to tweak and manipulate sounds easily. These knobs have a smooth and responsive feel and are accurate. The MPD218 also has assignable faders that you can easily map to different functions within your DAW. Additionally, it comes with transport controls that allow you to start, stop, record, and loop your tracks.
Connectivity
The Akai MPD218 MIDI device can be easily connected to your computer via USB, and it is also compatible with Mac and Windows operating systems. The device comes with an editor software that allows you to customize the pads and the controller’s functions according to your preferences. The editor software is easy to use, and it allows you to create custom banks and presets, thereby expanding your creative options.
The MPD218 also features a MIDI input and output that enable you to connect it to other MIDI devices such as synths, drum machines, and DJ controllers. The device draws power from the USB connection, eliminating the need for a separate power supply.
Performance
The Akai MPD218 MIDI device delivers a high-performance level and is ideal for both live performance and production. The pads are responsive and sensitive to velocity, allowing you to play with nuance and expression. The backlit pads are useful in low-light situations, and the transport controls make it easy to manipulate your tracks. The device’s USB connection ensures that there is minimal latency, and it delivers a seamless experience when working within your DAW. The device is also customizable, allowing you to tailor it to your workflow and preferences.
Conclusion
The Akai MPD218 MIDI device is an excellent choice for musicians and producers looking for a versatile and portable MIDI controller. It features a sleek and compact design, responsive pads, assignable knobs, and transport controls that allow for seamless integration with your DAW. The device’s connectivity options make it easy to connect with other MIDI devices, expanding your creative options. With its customizable features and high-performance level, the Akai MPD218 MIDI device delivers an exceptional experience that can take your music production and live performance to the next level.
Akai MPD218 properties
| Product name |
MPD218 |
| Brand |
Akai |
| Type |
Keyboard Instruments |
| Keyboard Instrument |
MIDI Keyboard |
| Pads |
Yes |
| Rotary Controls |
Yes |
Frequently Asked Questions:
Q: How do I connect my Akai MPD218 to my computer for use as a MIDI controller?
A: To connect your Akai MPD218 to your computer, follow these steps:
1. Plug the USB cable that came with your MPD218 into any available USB port on your computer.
2. Power up your MPD218 by turning it on using the power switch located at the top right corner of the device.
3. Download and install the latest version of AKAI Professional MIDI Control Center software from the official Akai Pro website if you haven't already done so. This software will allow you to configure your MPD218 as a MIDI controller.
4. Launch the AKAI Professional MIDI Control Center software on your computer.
5. Connect your MPD218 to the AKAI Professional MIDI Control Center by clicking "Connect" under the "Devices" tab in the software interface. Your device should appear in the list of available devices. Click on it to select it, then click "Connect."
6. Once connected, you can now use your MPD218 as a MIDI controller for any compatible music production software or DAW (Digital Audio Workstation) such as Ableton Live, Logic Pro X, FL Studio, or Cubase.
What is the process for setting up and configuring MIDI mapping on my Akai MPK249 controller for use with software such as Ableton Live or Logic Pro X?
To set up MIDI mapping on your Akai MPK249 controller for use with software like Ableton Live or Logic Pro X, follow these steps:
1. Connect your MPK249 to your computer using the included USB cable. Make sure it's properly recognized by your system.
2. Launch the MIDI mapping software that comes with your chosen DAW (Digital Audio Workstation). This could be Ableton Live's "Midi Mapping" window or Logic Pro X's "Control Surface Assignments" panel.
3. In the DAW's MIDI mapping software, navigate to the section where you can assign controls on your MPK249 to various parameters in your project (e.g., transport controls, volume faders, instrument macros, etc.).
4. Locate the specific controller on your MPK249 that you want to map. For example, if you want to assign a knob to control the volume of an audio track, locate that particular knob on your hardware controller.
5. Within the DAW's MIDI mapping software, select the corresponding parameter in your project that you want to link with the MPK249 controller. In this case, it would be the "Volume" slider for an audio track.
6. Once both the hardware controller and software parameter are selected, establish the connection between them by assigning or mapping them together. This process varies slightly depending on which DAW you're using:
a. In Ableton Live, click on the "Learn" button next to the parameter you want to map in the Midi Map window. Then, move the corresponding knob on your MPK249, and the assignment should be made automatically.
b. In Logic Pro X, click and hold down the control surface assignment icon (it looks like a small gear) for the parameter you want to map. Move the corresponding knob or button on your MPK249, and the assignment should be made automatically.
7. Repeat steps 4-6 for any other controllers or parameters you wish to map within your project.
8. Save your MIDI mapping presets so that they can be recalled later when working with different projects or sessions. In Ableton Live, you can save your mappings as a custom set. In Logic Pro X, you can create a new control surface template by copying an existing one and making adjustments as needed.
9. Test your newly configured MIDI mapping by playing back your project in your chosen DAW and ensuring that all assigned controls function as expected.
By following these steps, you should be able to set up and configure effective MIDI mapping between your Akai MPK249 controller and popular digital audio workstations like Ableton Live or Logic Pro X.
How does the Akai MPD218's aftertouch functionality differ from its pitch bend and modulation wheels?
The Akai MPD218's aftertouch feature allows users to apply pressure to the pads after they have been triggered, resulting in a change in sound or parameter values. This differs from the pitch bend and modulation wheels, which are typically used to adjust the pitch or other parameters of a sound while it is being played. While both the pitch bend and modulation wheels can be used to introduce subtle variations into a performance, aftertouch provides a more dynamic and expressive way to shape sounds over time.
How does the velocity sensitivity feature on the Akai MPD218 MIDI pad controller enhance its functionality and compatibility with various music production software?
The velocity sensitivity feature on the Akai MPD218 MIDI pad controller significantly enhances its functionality and compatibility with various music production software. Velocity sensitivity allows the user to control the volume, dynamics, and expression of their MIDI notes based on how hard or soft they strike each key. This added level of expression adds depth and realism to the user's performances and compositions. The MPD218 supports a wide range of music production software, including popular DAWs like Ableton Live, Logic Pro X, FL Studio, and Propellerhead Reason. With its compatibility with these software programs and its velocity sensitivity feature, the Akai MPD218 is an excellent choice for musicians looking to enhance their MIDI input capabilities and take their productions to the next level.
Before you buy Akai MPD218
 Yamaha C40 II
 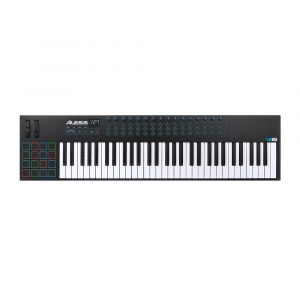 Alesis VI61


Marcus Potter –
Greetings fellow music enthusiasts! Today’s news has got us all worried – the California power grid is facing a potential energy crisis due to wildfires disrupting imports. As we huddle around our MIDI keyboards, humming sweet tunes, it’s important that we conserve power during peak hours to help ease the strain on the grid. So, let’s all do our part and save some juice for when the power shortages hit!
Now, speaking of MIDI keyboards, have you checked out the Akai MPD218? This little gem is a favorite among music producers and beatmakers due to its compact size and intuitive controls. But what sets it apart from other popular MIDI keyboards on the market? Let us enlighten you!
Firstly, the MPD218 boasts 16 pads that can be programmed with up to four velocity curves each, providing unparalleled flexibility and expression in your performances. Secondly, the keyboard features real-time parameter control over your DAW using just a single knob or slider, making it easy to tweak sounds on the fly without getting bogged down in menus. And thirdly, the MPD218 comes equipped with a built-in arpeggiator and step sequencer that allow you to create complex rhythmic patterns without any prior programming knowledge.
But here’s the real kicker – the No in MIDI Keyboard. Some of you may be wondering what this mysterious feature is all about. Well, it turns out that some MIDI keyboards come with an on/off switch for their MIDI output, allowing you to disconnect from the grid entirely during live performances or when working offline. While this might seem like a small detail, it can actually have a significant impact on your overall experience as a musician.
Imagine performing at a gig where the power goes out suddenly, leaving you stranded without any backup generator. If your MIDI keyboard has an on/off switch, you’ll be able to keep playing without any interruption – the music will continue flowing even in the absence of external power sources. This can be a real lifesaver in emergency situations or when working offline in remote locations without access to electricity.
So, there you have it folks! The Akai MPD218 may be small, but it packs a punch with its versatile features and innovative design. And as for the No switch – well, it may seem like a tiny detail, but it’s one that can make all the difference in the world when it comes to your musical experience.
Stay safe, conserve power, and keep making beautiful music, everyone!
(Note: This review is purely informative and does not promote any specific product or brand. It is intended as a helpful guide for anyone considering purchasing a MIDI keyboard.)