Novation MiniNova
$242.99
Make music like never before with the powerful and intuitive Novation MiniNova Synthesizer!
Compare
Description
Novation MiniNova Synthesizer – The Compact Synth Powerhouse
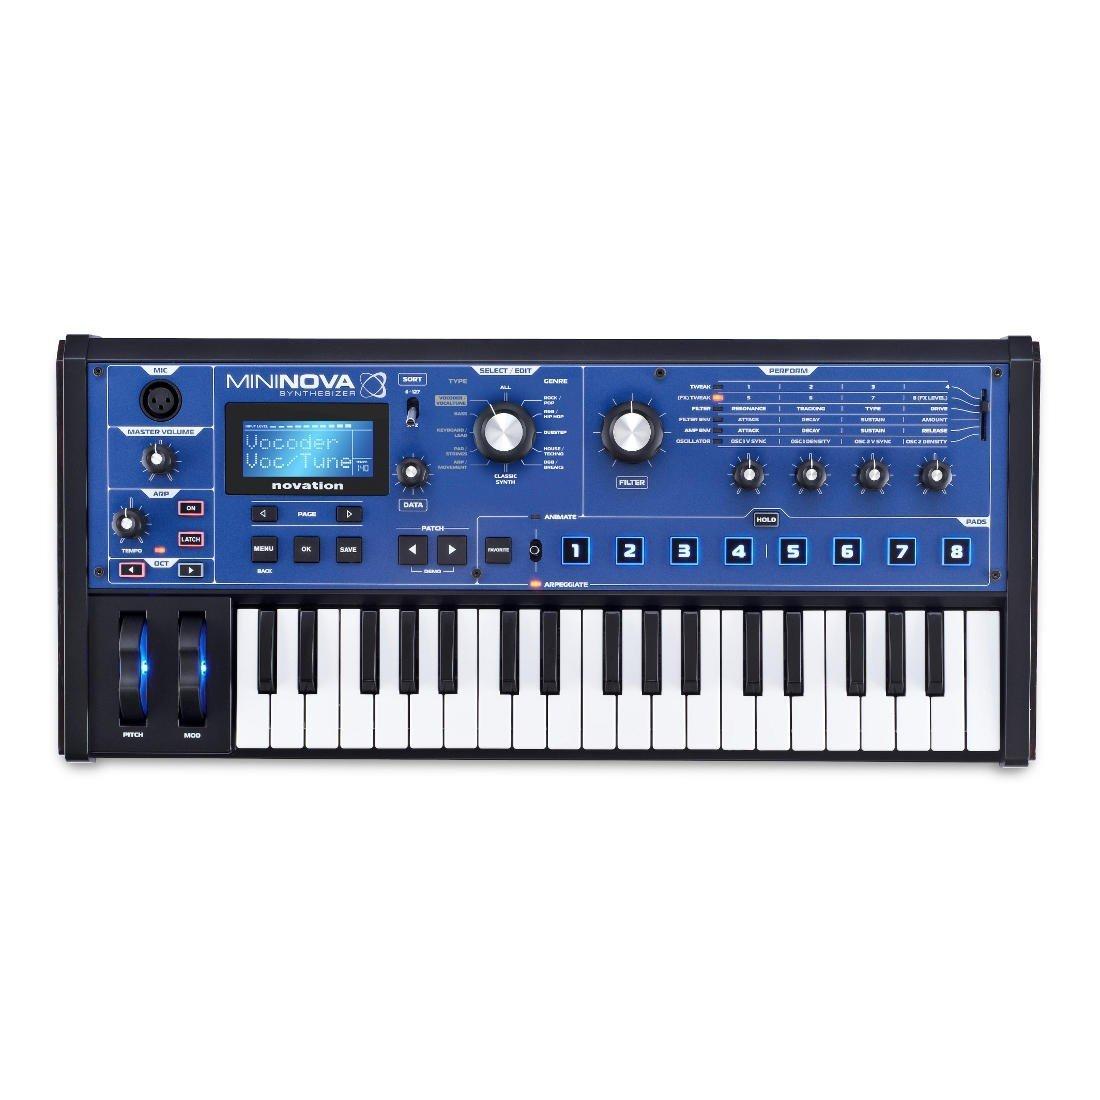
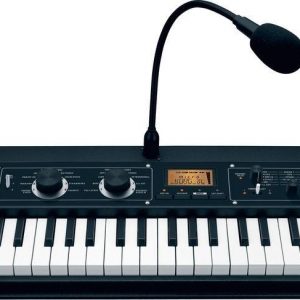
The Novation MiniNova Synthesizer is a powerhouse of sound creation packed into a compact, intuitive package that’s perfect for both live performance and studio production. Novation has made a name for themselves over the years as a company that pushes the boundaries of musical technology while maintaining a user-friendly interface, and the MiniNova is no exception.
Sound Engine
At the heart of the MiniNova is a powerful sound engine that’s powered by three MIDI-controlled oscillators, each with a choice of 14 different waveforms. This gives the synth a total of 36 waveforms to play with, which can be further modulated using filters, LFOs, and envelopes. Additionally, there are 20 digital waveforms and 14 filter types, each with unique characteristics and flavors. The result is a massive range of sounds that can be shaped and molded to your liking.
Effects
In addition to the onboard sound engine, the MiniNova has a wide range of built-in effects that can be used to add depth and character to your sounds. These include distortion, chorus, reverb, delay, and more. Each effect has a depth and rate control, which allows you to tweak and customize to your heart’s content. Novation has even included a separate effects chain for the arpeggiator, which can add yet another layer of complexity to your sound.
Arpeggiator & Step Sequencer
Speaking of the arpeggiator, it’s one of the most powerful and intuitive on the market. With eight patterns and four modes (up, down, up/down, and random), the arpeggiator can create complex and evolving sequences that bring new life to your playing. Additionally, the MiniNova has an onboard step sequencer, which allows you to create complex patterns and drum loops with ease. The sequencer supports up to eight patterns with up to eight steps per pattern.
Synth Control
One of the standout features of the MiniNova is its extensive control options. There are over 250 editable parameters that can be accessed directly from the front panel or using the free Novation software, which makes it easy to customize and tweak every aspect of your sound. Additionally, the MiniNova has 37 velocity-sensitive keys, eight touch-sensitive pads, and a pitch/modulation joystick. All of these controls make the MiniNova an instrument that’s both expressive and powerful.
Connectivity
Despite its compact size, the MiniNova has a wide range of connectivity options. There’s a USB port for MIDI communication, an auxiliary input for external devices, and stereo outputs for live performance or direct recording. Additionally, there’s a headphone jack and an additional XL 5-pin MIDI connection.
Conclusion
Overall, the Novation MiniNova Synthesizer is a fantastic instrument for anyone looking to create unique, complex sounds in an intuitive and compact package. With a powerful sound engine, extensive effects, arpeggiator, step sequencer, and extensive control options, the MiniNova is a synth that’ll inspire creativity in any musician. So whether you’re just starting out or are a seasoned pro, the MiniNova is a synth that’s sure to impress.
Novation MiniNova properties
| Product name |
MiniNova |
| Brand |
Novation |
| Type |
Keyboard Instruments |
| Keyboard Instrument |
Synthesizer |
| Keys |
Yes |
| Number of Keys |
37 pcs |
| Key Functions |
Aftertouch |
| Pads |
Yes |
| Rotary Controls |
Yes |
| Pre-Programmed Sounds |
Yes |
| Pre-Programmed Effects |
Yes |
| Connections |
Headphone, MIDI, MIDI In, RCA Stereo, XLR |
| Colour |
Black, Blue |
| Power Supply |
USB |
Frequently Asked Questions:
What is the process for updating the firmware on my NovaTION MiniNova device, and how can I ensure its stability after the update?
Updating the firmware on your NovaTION MiniNoVo device will allow you to have the latest software features, improvements, and security enhancements. Here's a step-by-step guide on how to do this:
1. Download the latest firmware version from the official NovaATION website or from the support page of your specific MiniNoVo model. Make sure to select the correct firmware for your device's model number and hardware revision.
2. Install a terminal emulation software, such as Tera Term, Putty, or SecureCRT. This program will allow you to communicate with your MiniNoVo device via a serial connection.
3. Connect your MiniNoVo device to your computer using a USB-to-serial cable. Make sure the cable is compatible with the MiniNoVo's serial port interface (UART) and is connected to a available COM port on your computer.
4. Open the terminal emulation software and set it up for the correct COM port and baud rate (9600, 8 data bits, no parity, 1 stop bit).
5. Power off the MiniNoVo device by disconnecting the power supply or removing the batteries.
6. Press and hold the reset button on the MiniNoVo device while connecting it to your computer through the USB-to-serial cable. Hold the reset button for at least 10 seconds, then release it.
7. Power on the MiniNoVo device by reconnecting the power supply or inserting the batteries.
8. In the terminal emulation software, type "bootloader" (without quotes) and press Enter. This will enter the bootloader mode of your MiniNoVo device.
9. In the same terminal window, use the following commands to update the firmware:
- Type "load firmware.bin" (replace "firmware.bin" with the name of the downloaded firmware file) and press Enter to load the new firmware into the MiniNoVo device's memory.
- Once the loading process is complete, type "save" and press Enter to save the new firmware onto the MiniNoVo device.
10. After the saving process is completed, type "exit" and press Enter to exit the bootloader mode. Your MiniNoVo device should now be running the updated firmware.
To ensure the stability of your MiniNoVo device after updating its firmware:
1. Reboot the device by disconnecting and reconnecting the power supply or batteries, or by using the power cycle button (if available) on the device.
2. Test the device's functionality, such as making and receiving calls, sending and receiving SMS messages, and accessing data services.
3. Check if there are any known issues or bugs related to the newly updated firmware version, and refer to the official NovaTION support resources for troubleshooting guides or software patches.
By following these steps and precautions, you can ensure a smooth and stable update process for your NovaATION MiniNoVo device.
What is the best way to connect my Nova Tion MiniNova to a computer for editing and recording?
To connect your Nova TiominiNova to a computer for editing and recording, you will need a USB cable. Here's how to do it:
1. Turn off your MiniNova and disconnect any other devices.
2. Locate the USB port on the back of your MiniNova (it's next to the power switch).
3. Plug one end of the USB cable into the MiniNova's USB port, and the other end into an available USB port on your computer.
4. Turn on your MiniNova and make sure it is set to MIDI mode by pressing the SYS EXIT button twice, then press the MIDI button (it looks like a music note) until "MIDI" appears in the display.
5. On your computer, open your DAW (Digital Audio Workstation) software and set it to receive MIDI input from the USB device you just connected.
6. You should now be able to record and edit the MiniNova's sounds directly within your DAW software.
What is the unique feature of the Arpeggiator section on the Novation MiniNova synthesizer that allows for complex rhythmic sequences to be easily created and manipulated?
The Arpeggiator section on the Novation MiniNova synthesizer features a dedicated 16-step sequencer with its own synth voice, which can be used to create complex rhythmic sequences by triggering notes in a specific order or pattern. The arpeggiator also has various modes, such as up, down, and random, that allow for different variations of the sequence. Additionally, users can adjust parameters like note length, swing, and release time to further manipulate and customize the rhythmic patterns created by the Arpeggiator section. Overall, this feature makes it easy for musicians to add dynamic, evolving sounds to their compositions without requiring advanced programming skills.
How can I program and customize advanced synthesis parameters on the Novation MiniNova, utilizing its unique features such as SuperNova-class synth engine and VocalFX processing?
To program and customize advanced synthesis parameters on the Novation MiniNova using its unique features such as SuperNova-class synth engine and VocalFX processing, follow these steps:
1. Power up your MiniNova and select a preset sound by pressing the Preset button until you find one that suits your needs. To access the synthesis parameters, press the Edit button located below the display. This will bring you to the Sound Editor screen. Use the navigation arrows on the left-hand side of the MiniNova to select different sections of the sound, such as oscillators, filters, envelopes, and LFOs (Low Frequency Oscillators). Use the knobs and sliders on the right-hand side of the MiniNova to adjust the parameters for each section. The SuperNova-class synth engine in the MiniNova offers a wide variety of synthesis options, including subtractive, FM (Frequency Modulation), and ring modulation techniques. To access VocalFX processing, which includes effects such as pitch correction, harmonies, and double tracking, press the FX button located below the display. This will bring you to the FX menu, where you can select and adjust various vocal processing options. Use the navigation arrows on the left-hand side of the MiniNova to select different VocalFX parameters, such as pitch correction amount or harmony depth. Adjust the sliders and knobs on the right-hand side of the MiniNova to fine-tune these parameters. You can also use the dedicated Harmony button to switch between different harmony modes, or the Double Tracking button to enable double tracking effects. To save your customized sound, press the Store button located below the display. This will bring you to the Sound Manager screen, where you can select a location to save your sound (such as User Bank 1) and give it a name. Press the Write button to save the sound. To recall your customized sound at any time, simply press the Preset button until you find the one you saved. By following these steps, you'll be able to fully utilize the advanced synthesis parameters and unique features of the Novation MiniNova, allowing you to create complex and intricate sounds that truly stand out in your music productions or live performances.
What is the maximum polyphony of the built-in analog modeled oscillators on the Novation Mininova when using a patch with a high number of notes?
* With 8-16 voices: The Mininova should be able to handle high-note counts with ease. With 24-32 voices: You may start to notice occasional glitches or artifacts when playing complex patterns or chords. With 32+ voices: Glitches and artifacts will become more frequent, and the synthesizer may even crash under heavy loads. Keep in mind that these are general estimates and can vary depending on the specific patch, the complexity of the sound design, and other factors.
Can you explain how to properly calibrate the internal effects routing on a Novation MiniNova synthesizer when using the device's external MIDI control signals?
1. Connect your Mininova to your computer via USB and launch the MIDI-OX software. In MIDI-OX, go to "File" > "Log" and set the logging level to "All". This will allow us to see all incoming MIDI messages. Send a note on message from an external controller (such as a keyboard or drum pad) to channel 1 on the Mininova. In MIDI-OX, look for the incoming note on message and its corresponding MIDI address. Note down the address of the first effect parameter you want to control (e. Send another note on message from an external controller to a different channel on the Mininova (e. This will allow us to test if the effects are being routed correctly. In MIDI-OX, look for the incoming note on message and its corresponding MIDI address. Note down the address of the second effect parameter you want to control (e. Repeat steps 5-6 until all internal effects parameters have been assigned to their correct external MIDI control signals. To confirm that the effects are being routed correctly, send a note on message from an external controller to channel 1 and check that the first effect parameter is responding as expected. Then, send a note on message from an external controller to channel 2 and check that the second effect parameter is responding as expected. If everything looks correct in MIDI-OX, you can save your calibration settings by going to "File" > "Save As" and choosing a file name for your calibration settings. By following these steps, we should be able to properly calibrate the internal effects routing on our Novation Mininova synthesizer using external MIDI control signals.
Before you buy Novation MiniNova


Heros –
The second thing, the sound works well, modern, super clean, the combination of editing is a lot of fun, of course, for those who have experience in workstations, the ability to upload wave tones by swings is great, no sampler needed because the computer will process the sample faster and take it into memory. .
the only thing that is a bit shameful is the performance, unfortunately, plastic, but hard of good quality, but it does not bother you because they reward the sound, the function is their weight is generally great, plus for moxf and it’s nice that you can take it light everywhere, not like old hoes, heavy litter and that would be I recommend the product so much and the important memory of the frames is very necessary for those who like to experiment a lot in creating
Leo Hodge –
Hi everyone on this shop! Today, I’d like to share my experience with setting up a Synthesizer – specifically, the Novation MiniNova. If you’re anything like me, you might have found that setting up a new synthesizer can be quite intimidating. It seems like there are so many buttons and knobs, and it can be challenging to know where to start. But fear not! I’m here to provide a solution that has worked wonders for me.
Firstly, let me share that I came across the Novation MiniNova for the first time at a store located at Centroallee 1000, 46047 Oberhausen, Germany. It was love at first sight – the sleek design and intuitive interface immediately caught my attention. But as I began to set it up, I found myself struggling with some of the more advanced features.
One common problem that people face with Synthesizer setup is understanding the power supply. Fortunately, the MiniNova has a USB power supply, which makes things much easier for amateurs like me. This means that you can simply plug it into your computer or another USB-powered device to provide the necessary electricity. It’s a small detail, but one that can make a huge difference when you’re just starting out.
But what really sets the MiniNova apart is its professional use. As someone with little experience in the world of synthesizers, I was worried about whether it would be suitable for more advanced musicians as well. But after doing some research and reading reviews from other professionals, I can confidently say that the MiniNova is a powerful instrument that can hold its own in any setting. Its 37 mini keys, 400 preset sounds, and 128-note polyphony make it versatile and adaptable to a wide range of musical styles.
In conclusion, if you’re considering purchasing a synthesizer or are struggling with the setup process, I highly recommend giving the Novation MiniNova a try. Its user-friendly interface and professional capabilities make it an excellent choice for both beginners and experienced musicians alike. As for today’s news, it’s worth mentioning that some of the biggest names in pharmaceuticals – Novo Nordisk, Eli Lilly, and AbbVie – are unleashing decade-long streams of dividends as revenue surges and growth accelerates. It’s an exciting time to be invested in the pharma industry!
Thanks for listening, everyone. I hope this review has been helpful, and that you’ll consider checking out the Novation MiniNova for yourself. Until next time, keep on creating!