What are Drum Loops?
A drum loop is a short segment of pre-recorded rhythmic percussion elements, typically containing drum sounds like kicks, snares, hi-hats, and other percussion instruments. These loops are usually created by professional drummers or producers and come in various styles and patterns. Drum loops can be single-bar loops, multiple-bar loops, or even longer sequences, and they form the rhythmic foundation upon which other musical elements are built.
Significance of Drum Loops in Music Production:
- Enhancing Rhythm and Groove: Drum loops provide a solid rhythmic foundation, allowing the producer to establish a groove and keep the track moving forward. A well-crafted drum loop can make the difference between a flat-sounding beat and a rhythmically engaging track that makes people want to dance.
- Time-Saving and Inspirational: Drum loops save valuable time in the production process since they offer pre-arranged and ready-to-use rhythms. This enables producers to focus more on other creative aspects of the music, such as melody, harmony, and arrangement. Moreover, they can serve as a source of inspiration, sparking new ideas for the track.
- Consistency and Professionalism: Drum loops provide consistency in rhythm throughout a song. This consistency is essential, especially in electronic dance music (EDM), hip-hop, and other beat-driven genres. Using professionally produced drum loops elevates the overall quality of the track and adds a sense of professionalism.
- Layering and Versatility: Drum loops can be easily layered with other drum sounds and samples, allowing producers to create intricate and unique percussive patterns. They can be pitched, reversed, time-stretched, and processed in various ways to match the overall aesthetic of the track.
- Live Performance and Collaboration: Drum loops are not limited to studio production; they are equally valuable in live performances. DJs and live electronic acts can trigger drum loops to add dynamics and excitement to their sets. Additionally, in collaborative music production, sharing drum loops can facilitate seamless teamwork among producers and musicians.
Using Drum Loops in FL Studio 20:
In FL Studio 20, incorporating drum loops into your project is a straightforward process:
- Importing Drum Loops: Simply drag and drop the drum loop file from your computer’s file browser into the FL Studio playlist or the channel rack.
- Time-Stretching and Adjusting Tempo: FL Studio’s audio editor allows you to time-stretch the drum loop to match the project’s tempo. This feature ensures that the loop synchronizes perfectly with your music.
- Slicing and Editing: If needed, you can slice the drum loop into individual elements or beats. This gives you more control over the arrangement and allows you to add variations or make custom modifications.
- Layering and Effects: Layer the drum loop with other drum samples or apply various effects and processing to create a unique sound.
- Automation: You can automate parameters like volume, panning, and effects to introduce variation and dynamics in the drum loop.
Creating the Kick Pattern
Creating the Kick Pattern in FL Studio:
- Select a Kick Drum Sample: To create a kick pattern, you’ll need a kick drum sample. FL Studio comes with various built-in kick samples, or you can import your own sample by dragging it into the Channel Rack or Browser.
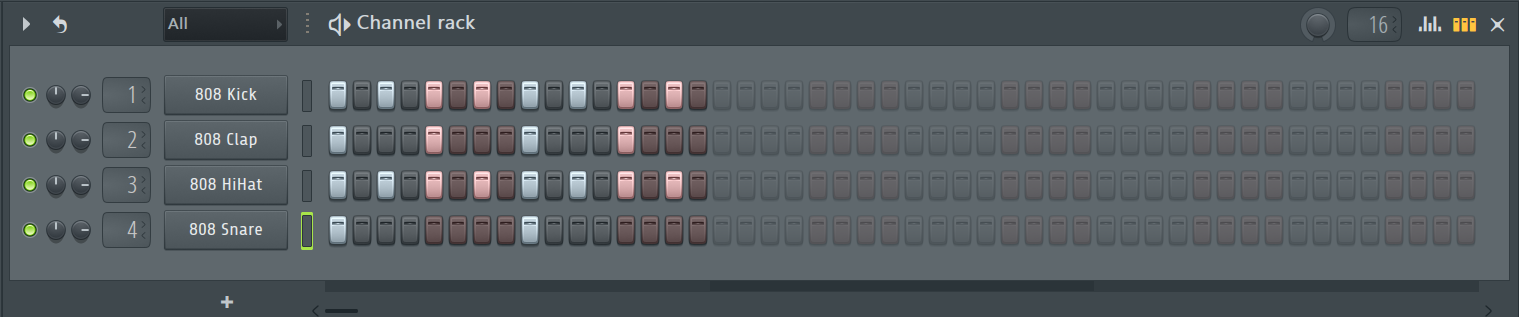
- Open the Channel Rack: The Channel Rack is where you manage your instruments and sounds. To open it, press F6 on your keyboard or click the “Channel Rack” button in the top toolbar.
- Load the Kick Drum Sample into a Channel: Drag your kick drum sample from the Browser onto an empty channel slot in the Channel Rack. Once the sample is loaded, you can trigger it by placing notes in the Piano Roll.
- Open the Piano Roll: To access the Piano Roll for the kick drum channel, right-click on the channel name in the Channel Rack and select “Piano Roll” from the context menu.
- Creating the Kick Pattern: In the Piano Roll, you will see a grid representing the time and pitch. The pitch doesn’t matter for a kick drum since it’s a single, non-pitched sound. Click on the grid where you want the kick drum to play. You can create a simple pattern by placing kicks on the downbeats (e.g., beats 1, 2, 3, and 4) or get more intricate by adding variations on the off-beats.
- Adjusting the Kick’s Length and Velocity: In the Piano Roll, you can adjust the length of the kick drum note by dragging its right edge. You can also change the velocity (volume) of the kick by dragging the note’s upper edge up or down.
- Experiment with Patterns and Variations: Don’t be afraid to experiment with different patterns and variations. Try placing kicks on different beats, add double kicks, or create syncopated patterns to find the groove that fits your track.
- Duplicate and Arrange: Once you’re satisfied with your kick pattern, you can duplicate it in the Playlist view to create a longer sequence. Arrange it to fit the structure of your song, and you can start building other elements around it.
- Processing and Layering: To enhance the kick’s sound, you can apply effects or use layering techniques with other kick samples to achieve a more unique and impactful sound.
Crafting the Snare Pattern
- Select a Snare Drum Sample: To craft a snare pattern, you’ll need a snare drum sample. FL Studio comes with various built-in snare samples, or you can import your own sample by dragging it into the Channel Rack or Browser.
- Open the Channel Rack: The Channel Rack is where you manage your instruments and sounds. To open it, press F6 on your keyboard or click the “Channel Rack” button in the top toolbar.
- Load the Snare Drum Sample into a Channel: Drag your snare drum sample from the Browser onto an empty channel slot in the Channel Rack. Once the sample is loaded, you can trigger it by placing notes in the Piano Roll.
- Open the Piano Roll: To access the Piano Roll for the snare drum channel, right-click on the channel name in the Channel Rack and select “Piano Roll” from the context menu.
- Creating the Snare Pattern: In the Piano Roll, you will see a grid representing the time and pitch. Click on the grid where you want the snare drum to play. The snare pattern is usually placed on the 2nd and 4th beats of a bar in a 4/4 time signature, creating the characteristic backbeat commonly found in many genres.
- Adjusting the Snare’s Length and Velocity: In the Piano Roll, you can adjust the length of the snare drum note by dragging its right edge. You can also change the velocity (volume) of the snare by dragging the note’s upper edge up or down. Varying the velocity can add dynamics and subtle accents to the snare pattern.
- Experiment with Patterns and Variations: Don’t be afraid to experiment with different snare patterns and variations. Try placing snare hits on different subdivisions of the beat or use ghost notes to add complexity and groove to the pattern.
- Duplicate and Arrange: Once you’re satisfied with your snare pattern, you can duplicate it in the Playlist view to create a longer sequence. Arrange it to fit the structure of your song, and you can start building other elements around it.
- Processing and Layering: To enhance the snare’s sound, you can apply effects or use layering techniques with other snare samples to achieve a more unique and powerful sound.
Utilizing Drum Fills and Rolls
Utilizing drum fills and rolls in FL Studio 21, or any newer version, can add excitement, energy, and transitions to your music productions. Drum fills are short rhythmic patterns that occur at the end of a section or before a significant change in the music, while drum rolls are rapid, continuous hits that create tension and anticipation. Here’s how you can use drum fills and rolls effectively in FL Studio:
1. Understand the Role of Drum Fills and Rolls: Drum fills are used to create a smooth transition between sections of a song or to add variation and interest to the rhythm. They typically lead into a new section, such as a chorus or bridge. Drum rolls, on the other hand, build anticipation and tension before a climax or drop in the music.
2. Identify the Sections for Fills and Rolls: Listen to your music arrangement and identify the sections where you want to place drum fills and rolls. Common places for drum fills are at the end of a verse leading into a chorus, before a breakdown, or before a drop in an EDM track. Drum rolls are often used before a big drop or during a build-up.
3. Load Suitable Drum Samples: Make sure you have suitable drum samples for your fills and rolls. You may use snare rolls, tom fills, or any other percussive elements that fit the vibe of your track. FL Studio offers a wide range of built-in drum samples, or you can import your own.
4. Open the Piano Roll for the Drum Channel: Right-click on the channel name of the drum you want to use for the fill or roll in the Channel Rack, and select “Piano Roll” from the context menu.
5. Creating Drum Fills: In the Piano Roll, experiment with different rhythmic patterns using the drum samples you’ve chosen. Create a short and distinct pattern that complements the music and adds a sense of resolution or anticipation, depending on where you place the fill. Aim for a pattern that stands out but also fits naturally within the groove of the song.
6. Creating Drum Rolls: To create a drum roll, you need a rapid succession of drum hits. You can use the Piano Roll’s “paint” feature to draw a continuous stream of drum notes with decreasing pitch (for snare rolls) or increasing pitch (for tom rolls). Alternatively, you can use FL Studio’s built-in “Roll” feature, which allows you to adjust the roll’s speed and length easily.
7. Automate the Volume and Effects: To make your drum fills and rolls more dynamic, you can automate the volume and apply effects like reverb, delay, or filter sweeps. This can add an extra layer of excitement and impact to the fills and rolls.
8. Arrange and Fine-Tune: Once you’ve created your drum fills and rolls in the Piano Roll, arrange them in the Playlist view at the appropriate points in your song. Fine-tune their timing and length to ensure they flow seamlessly with the rest of the track.
By effectively utilizing drum fills and rolls in FL Studio 21, you can elevate your music production to a new level. These rhythmic elements add interest, energy, and dynamics to your tracks, making them more engaging and captivating for the listeners. Remember to experiment and have fun with different patterns and variations to find the best fit for your music.
Applying Effects and Processing
Applying effects and processing to drums in FL Studio 21, or any newer version, is essential for shaping the sound and achieving a professional and polished drum mix. The right combination of effects can enhance the punch, clarity, and presence of your drum elements. Here’s how you can apply effects and processing to drums in FL Studio:
1. Load Your Drum Samples: Before applying effects, make sure you have your drum samples loaded into the Channel Rack. This could include kick, snare, hi-hats, cymbals, toms, and any other percussive elements you want to process.
2. Use the Mixer: FL Studio’s Mixer is the central hub for applying effects and processing to your individual drum channels. Press F9 on your keyboard or click the “Mixer” button in the top toolbar to open the Mixer.
3. Insert Effects on Individual Channels: In the Mixer, each drum channel corresponds to a mixer track. To insert effects, click on an empty slot in the mixer track of the drum you want to process, then choose an effect from the list of available plugins.
4. Compressor: Compressors are commonly used on drums to control their dynamic range and add sustain. Adjust the threshold, ratio, attack, release, and makeup gain settings to achieve the desired level of compression.
5. EQ (Equalizer): Use EQ to shape the tonal balance of your drums. For example, you can boost the low frequencies of the kick drum to add more punch or cut the harsh frequencies from the hi-hats to reduce sibilance.
6. Reverb and Delay: Reverb and delay can add space and depth to your drums. Apply a short reverb on snares and toms to create a sense of room, and use delay on certain drum elements to add a sense of space and movement.
7. Distortion and Saturation: Distortion and saturation can be used to add grit and warmth to your drum sounds. Experiment with different settings to find the right amount of saturation that complements your mix.
8. Parallel Processing: Consider using parallel processing techniques for your drums. Duplicate the drum channel, apply heavy processing (such as aggressive compression or distortion) to the duplicate, and then blend it with the original channel to add more intensity and character to the drum sound.
9. Grouping Drums for Processing: If you have multiple drum channels (e.g., multiple toms or hi-hats), group them together using a mixer track. This way, you can process them collectively and save CPU resources.
10. Automate Effects: Automation can add movement and variation to your drum mix. For example, you can automate the wet/dry mix of a reverb or the cutoff frequency of a filter over time.
11. Listen and Adjust: As you apply effects and processing, constantly listen to how they affect the drum sounds in the context of your mix. Make adjustments to the settings until you achieve the desired result.
Loop Arrangement and Structure
Drum loop arrangement and structure are crucial aspects of creating a cohesive and engaging rhythm for your music. A well-organized drum loop can provide a solid foundation for other musical elements to build upon. Here are some tips and considerations for arranging and structuring your drum loops effectively:
1. Intro: Start with a simple and uncluttered drum pattern for the intro. The goal is to set the tone and mood of the track without overwhelming the listener with too many elements.
2. Verse: The verse drum pattern should establish the groove and provide a rhythmic backdrop for the vocals or main instruments. Keep it relatively straightforward, allowing room for other elements to shine.
3. Pre-Chorus: As you approach the pre-chorus section, consider adding subtle variations or a slight increase in intensity to build anticipation for the upcoming chorus.
4. Chorus: The chorus is the climax of your track, and the drum pattern should reflect this energy. Add additional layers, fills, or variations to make the chorus stand out and feel more powerful than the verse.
5. Bridge or Breakdown: During a bridge or breakdown section, you can strip down the drum pattern to create a moment of contrast and breathe some space into the track. Sparse percussion or even temporary removal of drums can be effective in building tension and anticipation for the next section.
6. Build-Up: In the build-up leading to a drop or climax, consider using drum rolls, cymbal swells, and other elements to increase tension and excitement.
7. Drop or Climax: The drop is a pivotal moment in many electronic music genres. The drum pattern should be intense, energetic, and fully support the overall impact of the track.
8. Outro: Gradually simplify the drum pattern during the outro, bringing the energy down to a more subdued level. This helps to signal the conclusion of the song and prepare the listener for the end.
9. Transitions: Smooth transitions between different sections are essential for a cohesive arrangement. Use drum fills, rolls, and other percussive elements to bridge the gap between sections and create a seamless flow.
10. Variation and Progression: Keep the drum pattern evolving throughout the song to maintain interest. Introduce subtle changes, different drum sounds, or rhythmic variations to prevent monotony.
11. Layering and Panning: Experiment with layering different drum sounds to add depth and texture to the rhythm. Also, consider panning individual drum elements to create a sense of space and width in the mix.
12. Dynamics and Automation: Utilize volume automation to control the dynamics of your drum loop, particularly during fills and build-ups. This helps to create tension and excitement.
13. Listening and Refining: Continuously listen to your arrangement and make adjustments as needed. Pay attention to the overall balance and how the drum loop interacts with other instruments in the mix.
14. Practice and Experimentation: Creating compelling drum loop arrangements takes practice and experimentation. Don’t be afraid to try new ideas and approaches to find what works best for your specific track.
By carefully arranging and structuring your drum loops, you can create a rhythmic foundation that supports and enhances the overall musical experience. A well-crafted drum loop arrangement can elevate your music and keep listeners engaged from start to finish.
Conclusion
Building a drum loop in FL Studio 21 is a fundamental and creative process in music production. By carefully selecting and arranging various drum elements, producers can shape the rhythm, groove, and overall energy of their tracks. Here are the key takeaways:
- Foundation of Rhythm: Drum loops serve as the foundation of rhythm in a music production. They provide the backbone that other musical elements can build upon, ensuring a cohesive and engaging track.
- Choosing the Right Drum Sounds: Selecting appropriate drum samples is crucial in creating a drum loop. Whether it’s a punchy kick, snappy snare, shimmering hi-hats, or bright cymbals, the right sounds contribute to the overall character of the music.
- Arrangement and Structure: Crafting a well-organized drum loop involves considering the arrangement and structure of different sections. Utilizing variations, fills, and rolls strategically helps in creating dynamic and interesting drum patterns.
- Creativity and Experimentation: Music production is an art, and building drum loops in FL Studio allows for creativity and experimentation. Producers can try different rhythms, effects, and processing techniques to find a unique and distinctive sound.
- Balance and Integration: Balancing the drum loop with other elements in the mix is essential for a cohesive and polished final product. Ensuring that the drums complement the melody, harmony, and vocals creates a harmonious blend.
- Automation and Dynamics: Implementing automation for volume, panning, and effects adds movement and excitement to the drum loop. It helps in achieving dynamic shifts and smooth transitions between sections.
- Practice Makes Perfect: Building drum loops is a skill that improves with practice. Trying different styles and genres, analyzing drum patterns in existing tracks, and experimenting with new ideas all contribute to becoming a more proficient producer.
FL Studio 21, or any newer version, provides a versatile and user-friendly platform for crafting intricate and impactful drum loops. Whether you’re producing electronic dance music, hip-hop, rock, or any other genre, the art of building drum loops remains a fundamental aspect of music production. With dedication, creativity, and a willingness to explore new possibilities, producers can create compelling drum loops that elevate their music to new heights.