Sound design is the art of creating and manipulating audio elements to produce unique and expressive sounds. It plays a crucial role in music production, film, video games, and various multimedia projects. FL Studio 21 provides an ideal platform for sound design due to its intuitive interface, extensive plugin library, and versatile synthesis capabilities.
In this introduction to sound design in FL Studio 21, we’ll cover some essential concepts and features that make it a standout choice for sound designers:
- User-Friendly Interface: FL Studio’s user interface is designed to be approachable for both beginners and experienced users. The flexible layout allows users to arrange and customize their workspace according to their preferences, making it easier to access the tools they need for sound design.
- Powerful Synthesis Options: FL Studio offers various synthesis techniques that allow sound designers to create a wide range of sounds. From simple subtractive synthesis using plugins like 3xOsc to more complex techniques like additive, granular, and FM synthesis using plugins such as Harmor and Sytrus, FL Studio provides diverse sound generation possibilities.
- Extensive Plugin Library: FL Studio comes bundled with a rich selection of high-quality virtual instruments and effects plugins. From synthesizers and samplers to reverb, delay, and distortion plugins, users have access to an array of tools that aid in crafting unique sounds.
- Automation and Modulation: Sound design often involves dynamic changes over time. FL Studio’s automation and modulation capabilities allow users to create evolving sounds by automating various parameters. This includes everything from filter sweeps and panning to more complex modulation of plugin parameters.
- Audio Recording and Processing: While synthesis is a fundamental aspect of sound design, FL Studio 21 also supports audio recording and processing. This means sound designers can import external audio samples and manipulate them using a variety of effects and editing tools.
- Integration of External Hardware: For sound designers who prefer using external hardware, FL Studio 21 offers excellent integration options. MIDI controllers, synthesizers, and other hardware devices can be easily connected and mapped to control various parameters within the software.
- Effects and Mixing: FL Studio includes a wide array of effects such as EQ, compression, chorus, and more, enabling sound designers to sculpt and polish their sounds. The mixer within FL Studio allows for precise control over the individual elements, making it easier to achieve a professional mix.
- Creative Workflow: The non-linear workflow of FL Studio encourages creativity by allowing users to experiment freely with different sounds, arrangements, and ideas. This is particularly beneficial for sound designers who want to explore various sonic possibilities.
Understanding Sound and Waveforms
Sound is a fundamental element of music production and sound design. To harness the full potential of FL Studio 21, it’s essential to have a solid understanding of sound and the underlying concept of waveforms. This knowledge will enable you to create, manipulate, and shape sounds effectively within the software.
1. Sound and its Properties: Sound is a form of energy produced by vibrations that travel through a medium, such as air or water, and are detected by our ears. These vibrations create changes in air pressure, which our ears perceive as sound waves. Sound has several essential properties, including:
- Pitch: Pitch is the perceived frequency of a sound wave. Higher frequencies are perceived as higher pitches, while lower frequencies are perceived as lower pitches.
- Amplitude: Amplitude represents the intensity or loudness of a sound. Larger amplitude waves create louder sounds, while smaller amplitude waves produce softer sounds.
- Timbre: Timbre refers to the unique tone or color of a sound, which allows us to distinguish between different instruments or voices producing the same pitch at the same volume.
- Duration: Duration is the length of time a sound lasts. It can be short (like a drum hit) or sustained (like a vocal note).
2. Waveforms and their Types: In FL Studio 21, sound is represented visually as waveforms. A waveform is a graphical representation of the changes in air pressure caused by sound vibrations over time. FL Studio’s waveform view displays the amplitude (vertical axis) against time (horizontal axis).
There are several types of waveforms commonly encountered in sound design and music production:
- Sine Wave: A pure and simple waveform that represents a single frequency. It has a smooth curve and is fundamental in synthesizer design, serving as a building block for more complex sounds.
- Square Wave: A waveform with a distinct square shape. It contains odd harmonics and produces a rich and buzzy sound commonly associated with synthesizers.
- Sawtooth Wave: This waveform has a sawtooth shape and contains both even and odd harmonics. It produces a bright and aggressive sound, often used in lead and bass sounds.
- Triangle Wave: As the name suggests, this waveform has a triangular shape. It contains odd harmonics and produces a softer, mellower sound compared to square and sawtooth waves.
- Pulse Wave: Similar to the square wave but with a variable duty cycle (the percentage of time the wave is “on” compared to the total period). Pulse waves allow for more sound shaping possibilities.
3. Editing Waveforms in FL Studio 21: FL Studio 21 provides various tools for editing and manipulating waveforms. By understanding waveforms and their properties, you can effectively use these tools to create unique sounds:
- Envelope Control: Envelopes shape the evolution of a sound’s amplitude over time. FL Studio’s interface allows users to adjust the attack, decay, sustain, and release stages of an envelope to create smooth or percussive sounds.
- Pitch and Time Manipulation: FL Studio offers pitch-shifting and time-stretching capabilities, allowing you to change the pitch and duration of audio without affecting the overall quality significantly.
- Effects Processing: FL Studio comes with a wide range of built-in effects, such as reverb, delay, EQ, and more. Applying effects to waveforms can transform their timbre and add depth to the sound.
- Modulation and Automation: By using modulation and automation, you can create evolving sounds by changing various parameters over time. This adds movement and interest to your sound design.
Understanding sound and waveforms in FL Studio 21 is essential for anyone seeking to dive into music production or sound design. With this knowledge, you can confidently manipulate waveforms, create diverse sounds, and shape your audio to bring your creative ideas to life. Whether you’re working with synthesizers, recorded audio, or a combination of both, FL Studio’s robust tools and visual representation of waveforms empower you to explore the limitless world of sound design.
The Role of Filters and Equalization
Filters and equalization are essential tools in the sound designer’s arsenal. They play a significant role in shaping and sculpting audio, allowing producers to emphasize or attenuate specific frequencies, create interesting textures, and add depth to their sound. FL Studio 21 offers a variety of filter and equalization options, providing users with precise control over the frequency content of their audio.
1. Filters: Filters are audio processors that allow specific frequency ranges to pass through while attenuating or cutting off others. They are commonly used in sound design and music production to shape the tonal characteristics of sounds. FL Studio 21 features various filter types, each offering distinct filtering effects:
- Low-Pass Filter (LPF): This filter allows frequencies below a set cutoff point to pass through while attenuating frequencies above it. It creates a smooth and mellow sound, often used to add warmth to instruments or create subtle transitions.
- High-Pass Filter (HPF): In contrast to the LPF, the HPF allows frequencies above the cutoff point to pass through while attenuating frequencies below it. It’s useful for removing unwanted low-frequency rumble or adding clarity to sounds.
- Band-Pass Filter (BPF): The BPF permits frequencies within a specified range to pass through, attenuating both higher and lower frequencies. It can create a resonant or “nasal” sound and is useful for shaping the character of a sound.
- Notch Filter: This filter attenuates a narrow band of frequencies, often used to remove specific unwanted frequencies or feedback.
- Comb Filter: Comb filters create a series of notches that resemble the teeth of a comb. They are used for various effects, such as adding metallic tones or enhancing resonance.
2. Equalization (EQ): Equalization is the process of adjusting the balance of frequencies in an audio signal. It allows sound designers to boost or cut specific frequency ranges, giving them precise control over the tonal balance of their sounds. FL Studio 21 provides several EQ options to shape audio:
- Parametric EQ 2: This versatile equalizer allows users to control multiple bands of frequencies, adjusting the bandwidth (Q) and gain for each band. It’s suitable for surgical frequency adjustments and precise sound shaping.
- Fruity 7 Band EQ: A simpler equalizer with fixed bands, ideal for quick and straightforward adjustments to the frequency balance.
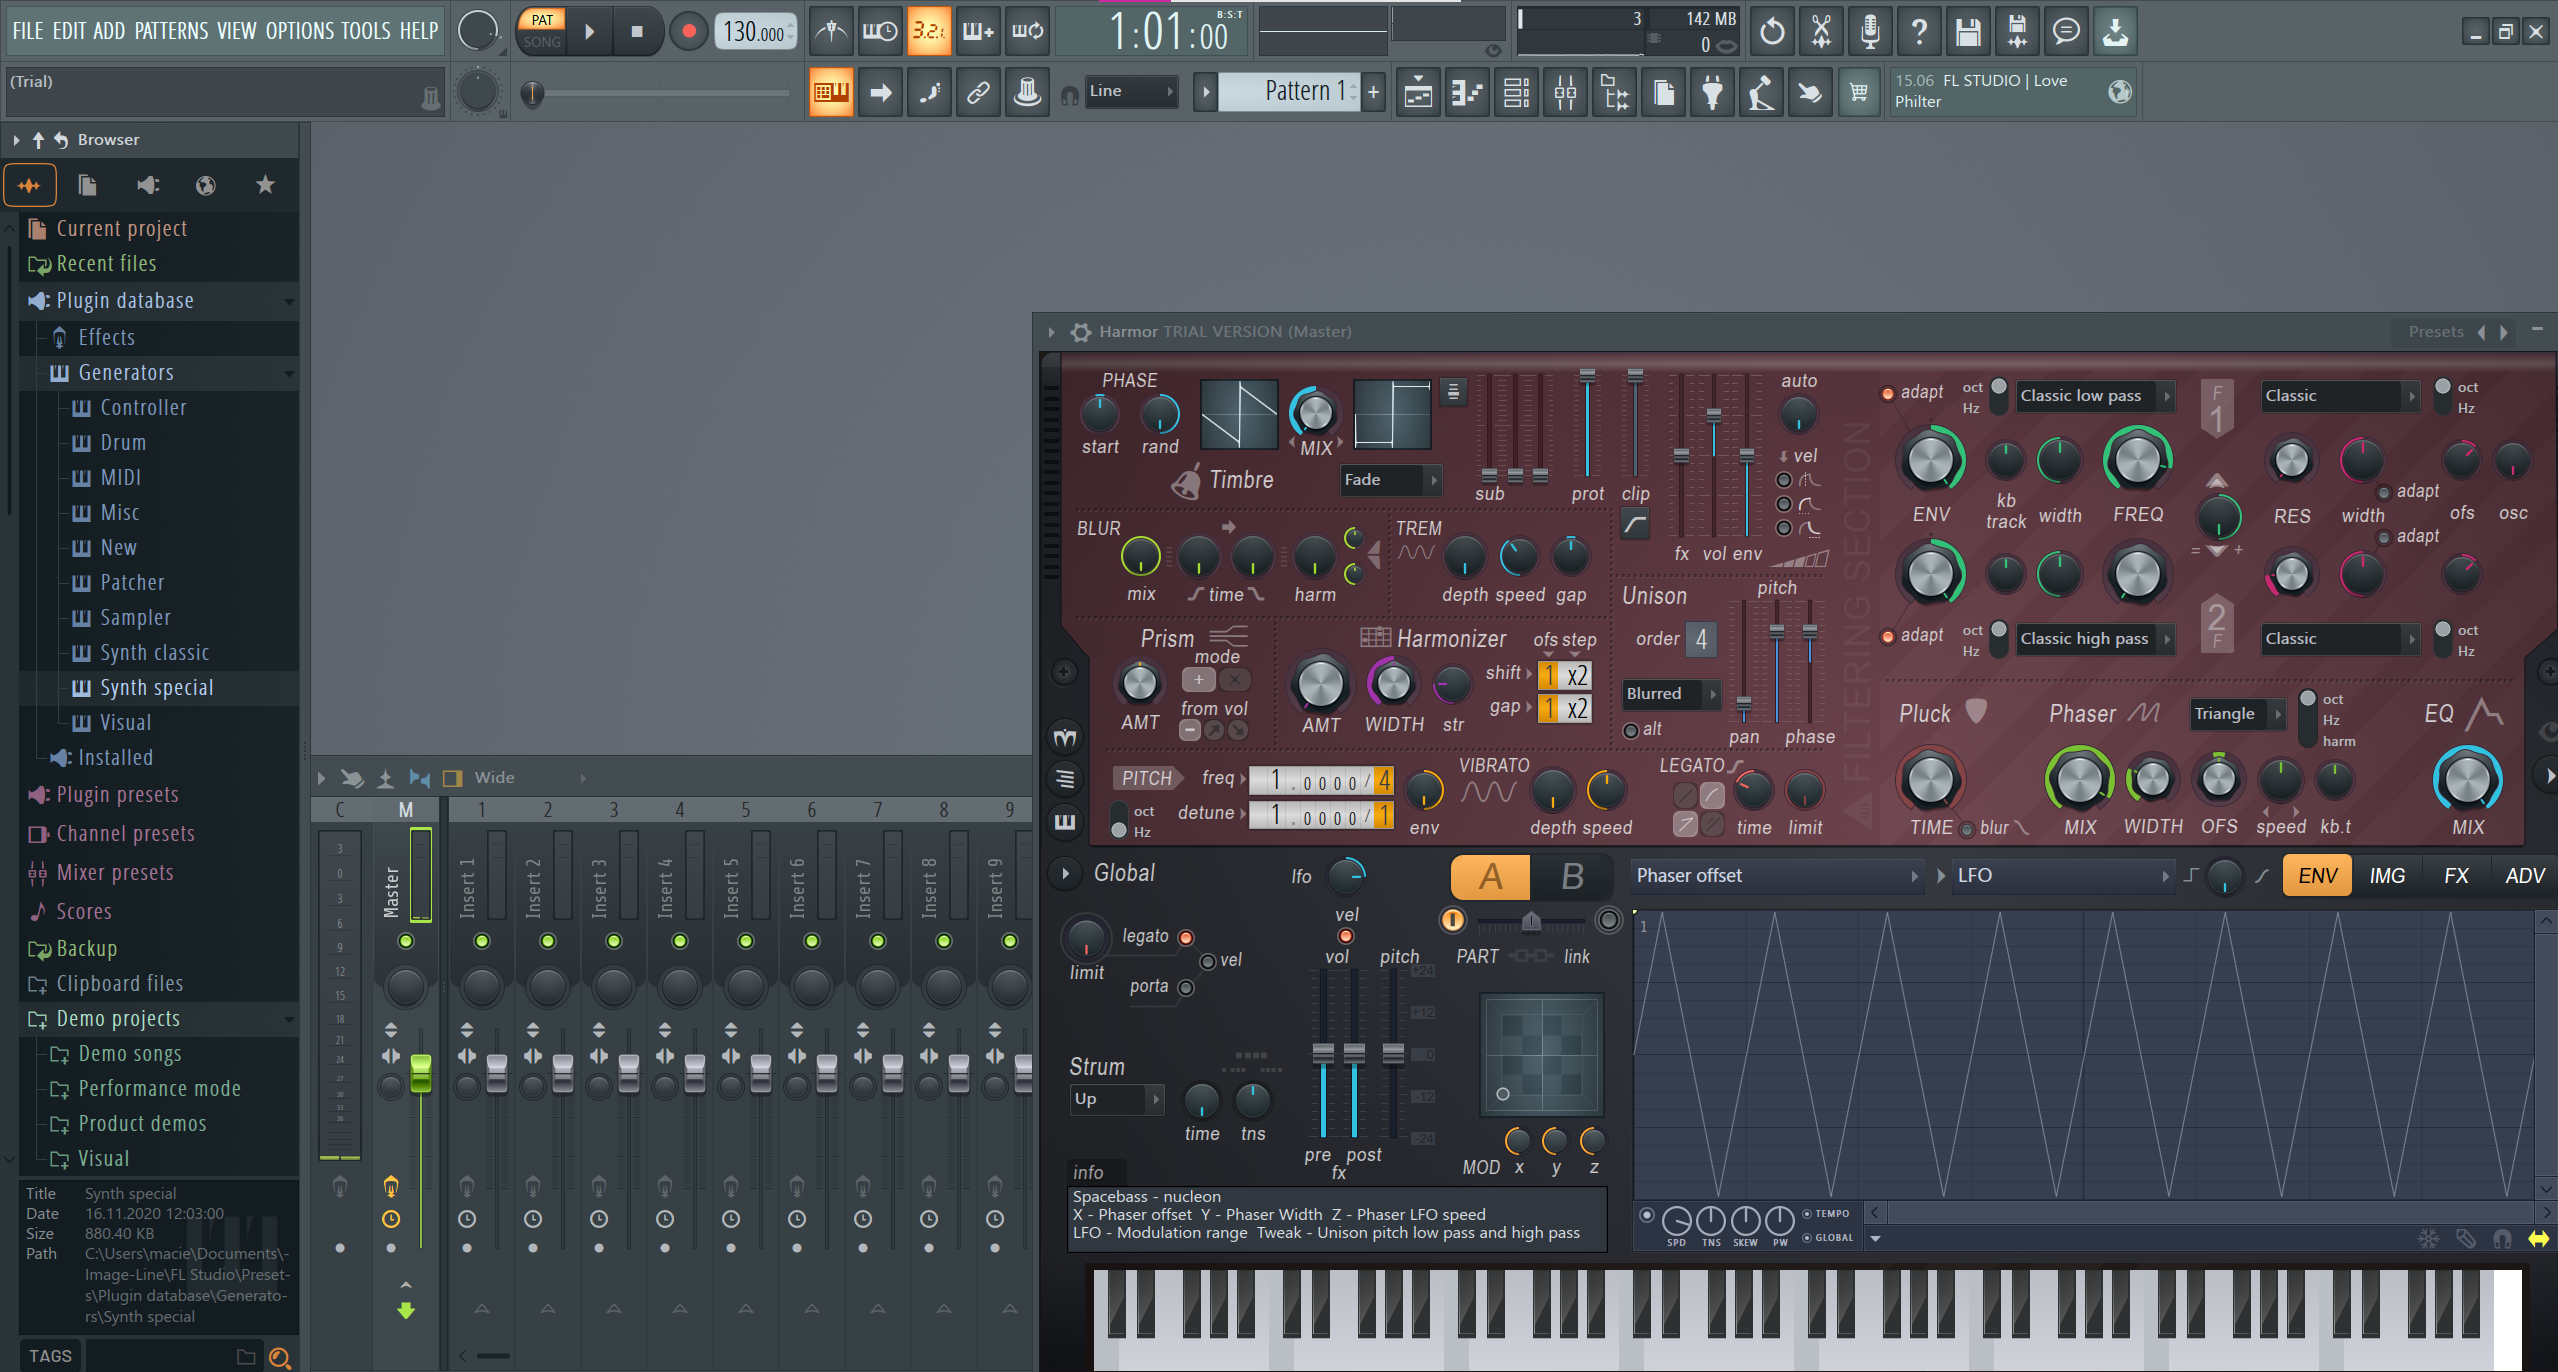
- Fruity Love Philter: Although primarily known as a filter plugin, Love Philter also offers equalization capabilities, making it a versatile tool for sound design.
3. Applying Filters and EQ in FL Studio 21: To apply filters and EQ to a sound in FL Studio 21, users can insert the respective plugins into the mixer or the effects slots of a channel. The plugins’ parameters can then be adjusted using their graphical interfaces or automation clips to create dynamic changes over time.
- Filter Cutoff and Resonance: Adjusting the cutoff frequency of a filter determines which frequencies are allowed to pass through, while resonance emphasizes frequencies near the cutoff point, creating a more pronounced effect.
- EQ Band Gain: By boosting or cutting the gain of specific EQ bands, you can shape the frequency response of a sound, making it brighter, darker, or emphasizing certain elements.
4. Creative Sound Design with Filters and EQ: Filters and equalization in FL Studio 21 open up a world of creative possibilities. Sound designers can use them to create unique textures, shape synth patches, sculpt the sound of instruments, and even design impactful sound effects. By combining different types of filters and employing various EQ techniques, you can achieve intricate and captivating sonic results.
Filters and equalization are powerful tools in FL Studio 21 that allow sound designers and producers to shape the frequency content of their audio. Whether you want to add warmth, remove unwanted frequencies, or create innovative soundscapes, understanding and using filters and EQ effectively can take your sound design skills to new heights in FL Studio 21.
Working with Envelopes and Modulation
Envelopes and modulation are powerful tools in FL Studio 21 that allow producers and sound designers to add movement, dynamics, and expressiveness to their audio. These features enable users to shape various parameters over time, creating evolving sounds and adding depth to their compositions. Understanding how to work with envelopes and modulation in FL Studio 21 opens up a world of creative possibilities and allows you to craft unique and dynamic music and sound designs.
1. Envelopes: Envelopes in FL Studio are used to control the evolution of specific parameters over time. The most common type of envelope used is the ADSR (Attack, Decay, Sustain, Release) envelope, which is often associated with shaping the amplitude of a sound. FL Studio 21 allows users to apply envelopes to various parameters, including volume, pitch, filter cutoff, and more. Here’s how they work:
- Attack: The attack stage represents the time it takes for a parameter to reach its maximum value from its initial state. For example, in a volume envelope, the attack determines how long it takes for a sound to fade in from silence to its full volume.
- Decay: After the attack phase, the parameter starts to decrease in value during the decay stage. This is useful for controlling how quickly or slowly a sound transitions from its initial peak level to the sustain level.
- Sustain: The sustain level is the parameter’s value while a note is held or a sound is sustained. This stage persists as long as the note or sound is active.
- Release: When a note or sound is released, the release stage comes into play. It determines how long it takes for the parameter to return to its initial state after the note is released.
2. Modulation: Modulation involves using one parameter to control another parameter over time. FL Studio 21 offers various modulation options, including automation clips, LFOs (Low-Frequency Oscillators), and MIDI controllers. Here’s how modulation works in FL Studio:
- Automation Clips: Automation clips allow you to create precise and complex movements of any parameter over time. You can draw in custom curves, ramps, or waves, giving you full control over how a parameter changes throughout your composition.
- LFOs: LFOs are dedicated modulation sources that generate cyclic waveforms at a lower frequency than audio signals. They are commonly used to create periodic changes in parameters, such as volume pulsations, filter sweeps, or tremolo effects.
- MIDI Controllers: FL Studio supports MIDI controllers, which allow you to use external hardware or software devices to modulate parameters in real-time. This is useful for adding expressive performances and dynamic changes during recording or live performances.
3. Applying Envelopes and Modulation in FL Studio 21: To apply envelopes and modulation in FL Studio 21, you can route them to control various parameters of plugins, mixer channels, or even external hardware:
- Envelopes: To apply an envelope, you can use FL Studio’s built-in envelope controller or assign it to a specific parameter in the plugin’s interface. Adjust the envelope’s attack, decay, sustain, and release stages to shape the desired parameter’s behavior over time.
- Modulation: To use modulation, right-click on a parameter, such as the filter cutoff or volume, and select “Link to Controller” or “Browse Parameters.” You can then choose the modulation source, such as an automation clip or LFO, and set the desired modulation range.
4. Creative Applications: Envelopes and modulation open up a vast array of creative possibilities in FL Studio 21. Sound designers can use them to create expressive leads, evolving pads, rhythmic effects, and intricate soundscapes. Musicians can add dynamics to their performances, breathing life into their compositions, and achieving a more human touch.
Working with envelopes and modulation in FL Studio 21 is a vital skill for producers and sound designers. Envelopes shape the evolution of specific parameters over time, while modulation allows one parameter to control another, adding movement and expressiveness to your music and sound designs. By harnessing the power of envelopes and modulation, you can take your compositions to new heights and create captivating and dynamic audio experiences in FL Studio 21.
Incorporating Effects and Processors
FL Studio 21 offers a diverse range of effects and processors that allow producers and sound designers to enhance, transform, and shape their audio. These effects and processors play a crucial role in adding depth, character, and polish to sounds, making them an integral part of the music production and sound design process. Understanding how to incorporate effects and processors in FL Studio 21 can elevate your productions to a professional level and unlock endless creative possibilities.
1. Types of Effects and Processors: FL Studio 21 comes with an extensive collection of built-in effects and processors. Some of the common types include:
- Reverb: Reverb simulates the acoustic space, adding a sense of depth and spaciousness to sounds. It’s used to create a sense of realism or to give sounds a sense of being in a specific environment.
- Delay: Delay creates echoes of the original sound, adding a sense of space and movement. It can be used to create rhythmic effects, spatial enhancement, and more.
- Equalizer (EQ): EQ allows you to adjust the balance of frequencies in an audio signal. You can boost or cut specific frequency ranges to shape the overall tonal balance of sounds.
- Compression: Compression controls the dynamic range of a sound by reducing the difference between the loudest and softest parts. It can add punch and presence to sounds and help them sit better in a mix.
- Distortion: Distortion alters the waveform of a sound, creating a gritty, edgy, or saturated effect. It’s often used in various genres to add character to sounds.
- Chorus: Chorus creates a thicker and wider sound by duplicating the original signal, slightly detuning it, and adding a slight delay.
- Phaser: Phaser creates a sweeping, swirling effect by splitting the sound into two or more delayed signals and modulating their phase relationship.
- Flanger: Flanger produces a similar effect to chorus but with shorter delay times, creating a more pronounced, jet-like sound.
- Bitcrusher: Bitcrusher reduces the bit depth of the audio, introducing a lo-fi, retro, or digital distortion sound.
2. Applying Effects and Processors: To incorporate effects and processors in FL Studio 21, you can add them to mixer channels or individual instrument tracks. Here’s a step-by-step guide:
- Insert Effects: Open the mixer and select a mixer channel or track. Click on the empty slot under “INSERT” and choose an effect or processor from the dropdown menu. The effect will now be inserted into the channel’s effects chain.
- Send Effects: For effects that you want to apply to multiple tracks, you can use the “SEND” tracks in the mixer. Assign the tracks you want to send to a particular effect to the same send track, adjusting the send level for each track to control the amount of effect applied.
3. Creating Effects Chains and Buses: FL Studio 21 allows you to build complex effects chains by adding multiple effects to a single mixer channel. Additionally, you can route tracks to buses, enabling you to process groups of sounds together. These techniques help keep your project organized and improve workflow efficiency.
4. Automation and Modulation: Automation and modulation are powerful tools to make effects and processors evolve over time. By automating various parameters of the effects, you can create dynamic changes and add movement to your sounds. In FL Studio 21, automation clips, LFOs, and MIDI controllers are excellent tools for achieving these effects.
5. Creative Sound Design and Mixing: Incorporating effects and processors is a crucial part of creative sound design and mixing in FL Studio 21. Experimenting with different combinations of effects and automation allows you to craft unique sounds, add depth to your tracks, and make your music stand out.
Effects and processors are essential components of the production process in FL Studio 21. By understanding the different types of effects available and how to incorporate them into your projects, you can enhance your sound design, elevate your mixes, and create music that captivates your audience. Whether you’re aiming for subtle enhancements or bold and experimental effects, FL Studio’s wide range of effects and processors empowers you to unleash your creativity and take your productions to new heights.
Sound Design with Synthesizers
1. Understanding Synthesis: Synthesis is the process of creating sound from scratch using various waveforms, oscillators, filters, and modulation techniques. FL Studio 21 offers different types of synthesis methods, each with its own sonic characteristics:
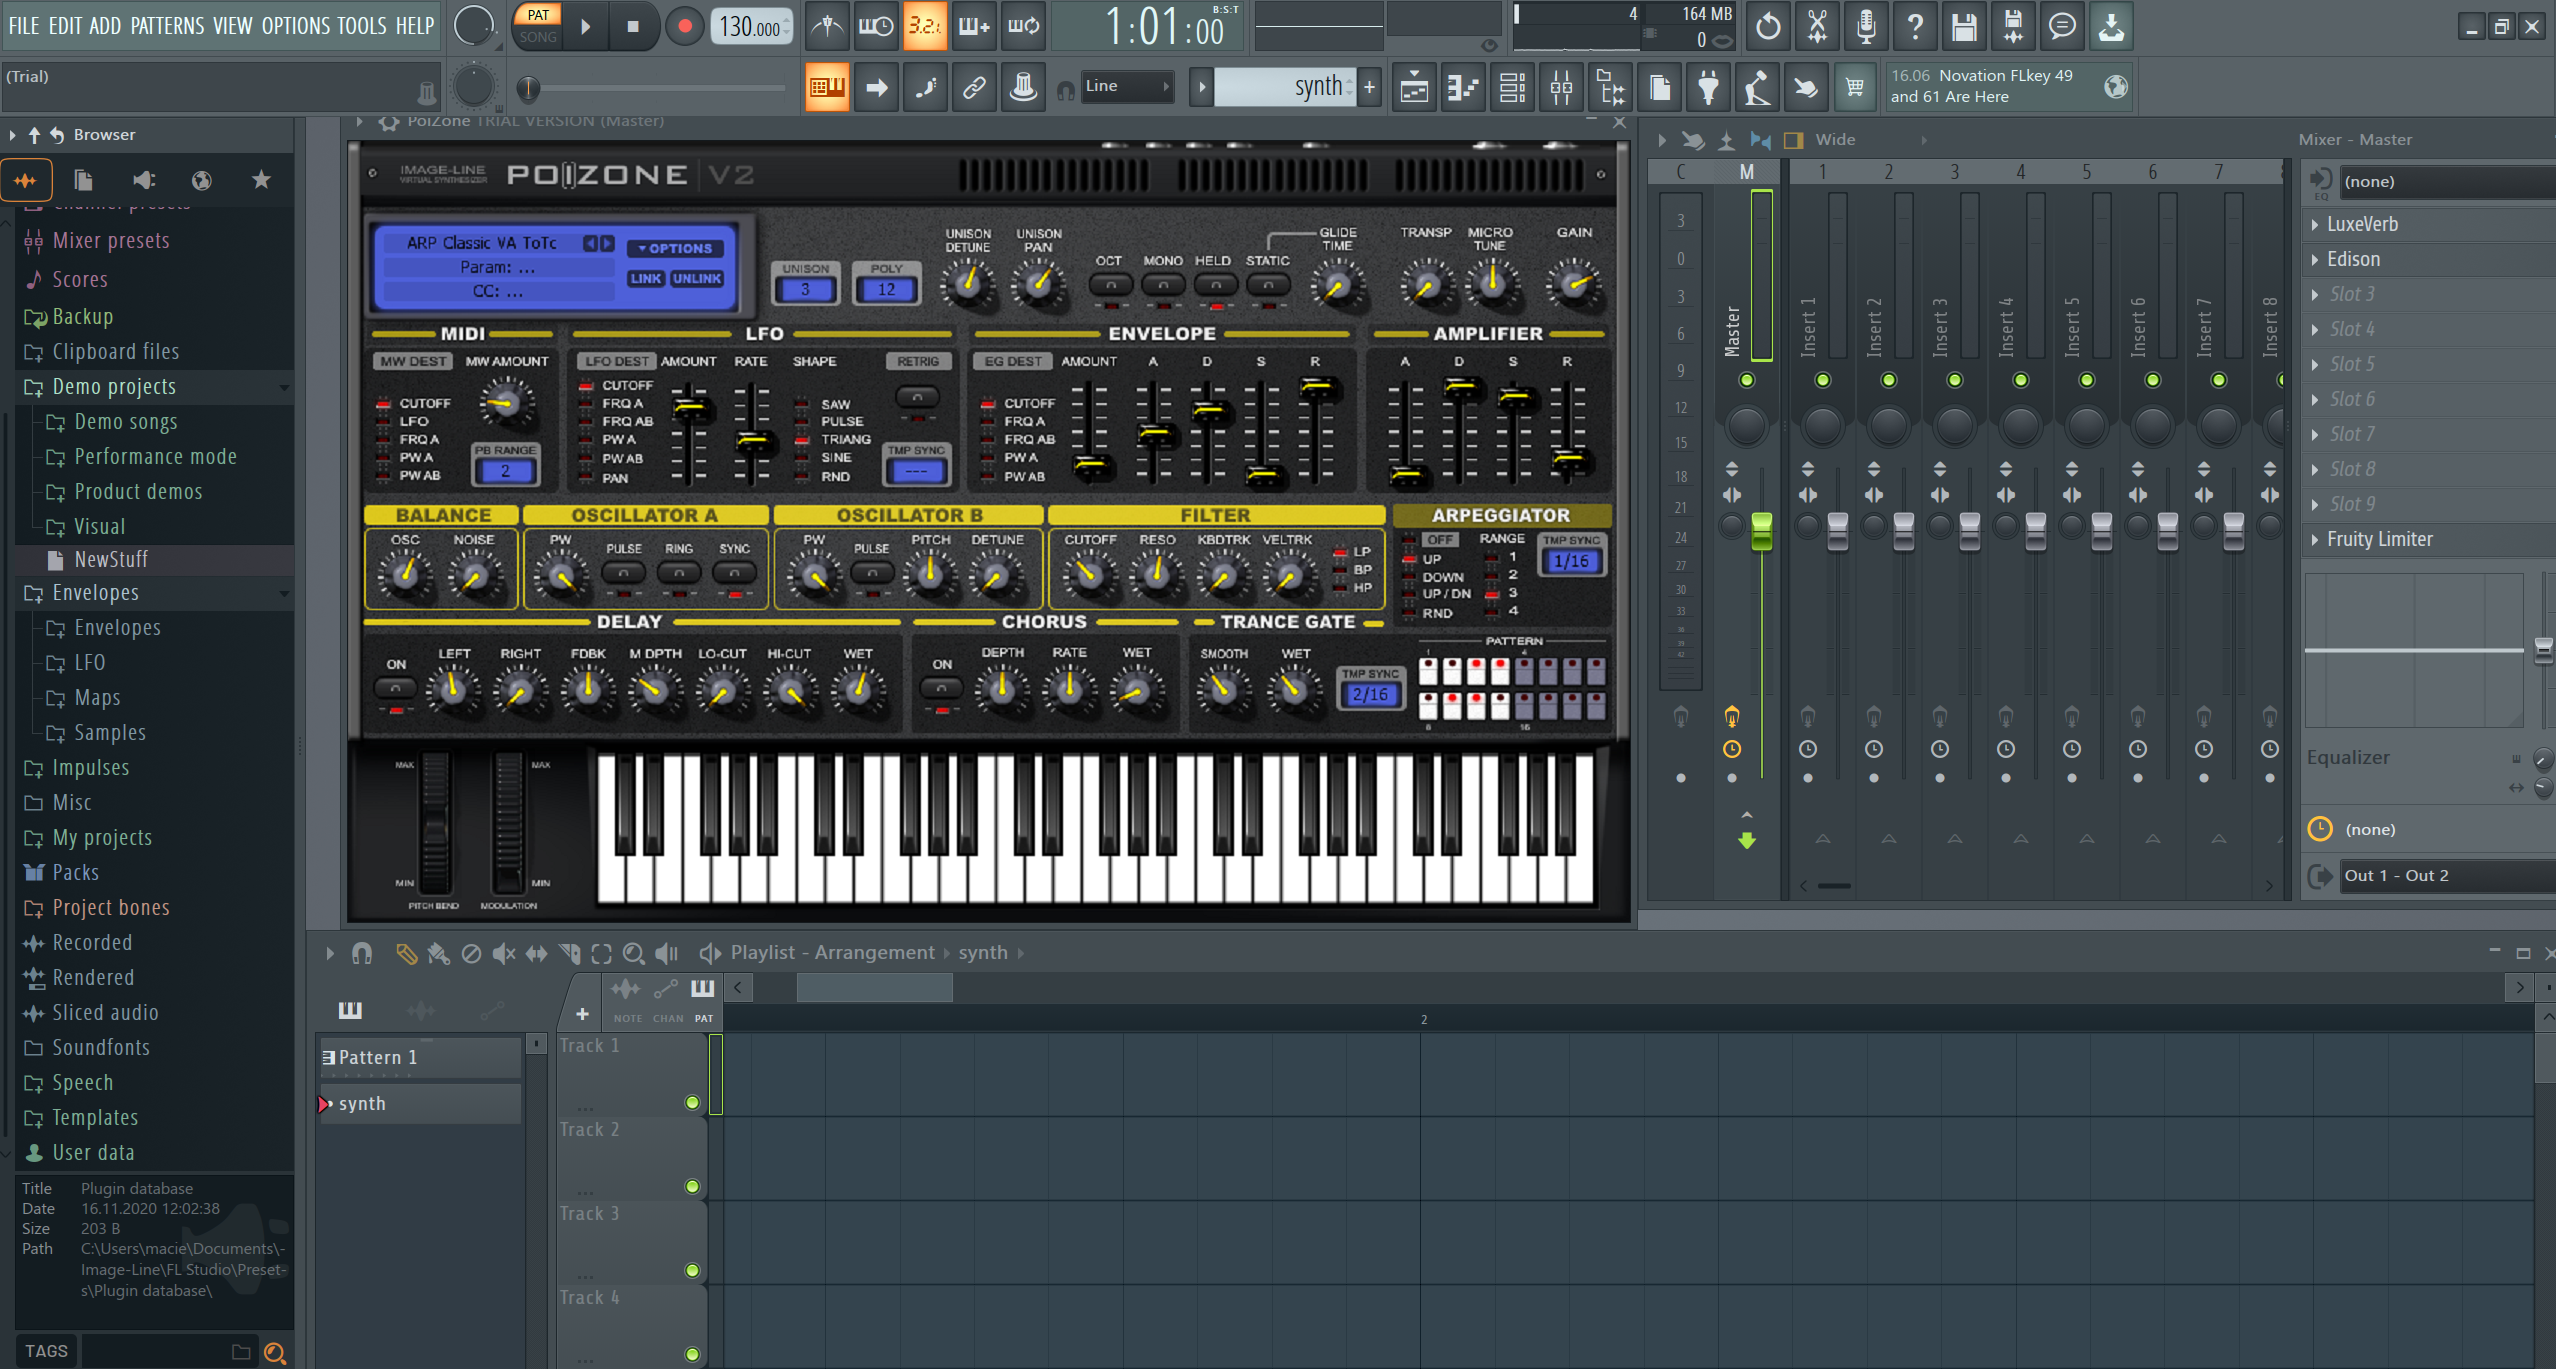
- Subtractive Synthesis: This is the most common type of synthesis used in FL Studio. It involves starting with a rich harmonic sound (usually a sawtooth, square, or pulse wave) and then subtracting frequencies using filters (low-pass, high-pass, band-pass) to shape the desired sound.
- Additive Synthesis: Additive synthesis builds complex sounds by combining multiple sine waves at different frequencies and amplitudes. While less common in FL Studio, it can produce unique and rich timbres.
- FM Synthesis: Frequency Modulation (FM) synthesis involves using one oscillator (operator) to modulate the frequency of another oscillator, creating intricate and metallic sounds. FL Studio’s native plugin “Sytrus” is a powerful FM synthesizer.
- Granular Synthesis: Granular synthesis breaks down sound into tiny grains and allows manipulation of their pitch, duration, and position in time. This type of synthesis can create ethereal and otherworldly textures.
2. Working with Synthesizers in FL Studio 21: FL Studio 21 comes bundled with a variety of synthesizers, each catering to different synthesis methods. Some popular ones include:
- 3xOsc: A simple yet versatile subtractive synthesizer with three oscillators, capable of creating a wide range of sounds, from basses to leads.
- Harmor: An advanced additive and subtractive synthesizer with resynthesis capabilities. It allows for complex sound manipulation and timbral shaping.
- Sytrus: A powerful FM and additive synthesizer with six operators, extensive modulation options, and a wide array of preset sounds.
- FLEX: FLEX is a versatile synthesizer with a broad library of sounds and the ability to create custom presets with ease.
- Patcher: While not a standalone synthesizer, Patcher is a powerful tool for creating custom synthesizer patches and signal processing chains.
3. Sound Design Techniques: When working with synthesizers for sound design in FL Studio 21, you can employ various techniques to achieve your desired results:
- Experiment with Oscillators: Start by experimenting with different oscillator waveforms (sine, saw, square, etc.) to establish the basic timbre of your sound.
- Use Filters: Apply filters to shape the sound by cutting or emphasizing specific frequency ranges. This can drastically change the character of your sound.
- Modulation and Envelopes: Utilize modulation sources (LFOs, envelopes) to create movement and dynamic changes in your sound over time. These can add expressiveness and interest to your sound design.
- Layering and Stacking: Layer multiple sounds or synths to create more complex and unique textures. Stacking different sounds can result in richer and more full-bodied timbres.
- Experiment with Effects: Combine various effects, such as reverb, delay, chorus, and distortion, to add depth and spatial qualities to your sound.
- Automation and Performance: Record or draw automation for different parameters to create evolving and expressive soundscapes. This is especially useful for live performances and cinematic sound design.
4. Sound Design Workflow: FL Studio 21 provides a flexible workflow for sound design with synthesizers. You can easily drag and drop plugins into the step sequencer or the channel rack to start creating your sound. The piano roll allows precise control over pitch and modulation, and the mixer allows you to process and mix your synthesized sounds with other elements of your composition.
5. Presets and Sound Libraries: While exploring sound design with synthesizers, don’t forget to experiment with presets and sound libraries. FL Studio’s synthesizers often come with extensive preset libraries that can serve as a great starting point for your sound design journey. As you get more comfortable with sound design, you can tweak and customize these presets to create your unique sounds.
Conclusion
Mastering the sound design basics in FL Studio 21 opens up a world of creative possibilities for musicians, producers, and sound designers. FL Studio’s powerful synthesis capabilities, extensive plugin library, user-friendly interface, and flexible workflow make it an ideal platform to explore and shape unique and expressive sounds.
Understanding the concepts of sound, waveforms, filters, and equalization lays the foundation for crafting diverse textures and timbres. By grasping the role of envelopes and modulation, users can add movement, dynamics, and life to their audio creations. Incorporating effects and processors enhances the depth and character of sounds, taking compositions to a professional level and imbuing them with an individual touch.
In FL Studio 21, sound design becomes a journey of exploration and experimentation. From crafting intricate melodies to sculpting otherworldly soundscapes, FL Studio empowers users to unleash their creativity and push the boundaries of musical expression.
As users delve into the vast array of synthesizers, effects, and tools available, they will discover their unique voice in the sonic landscape. By combining technical knowledge with artistic vision, FL Studio 21 becomes a playground for sonic experimentation and innovation.
Sound design basics in FL Studio 21 pave the way for endless creativity and artistic growth. Whether one is a seasoned professional or just starting the musical journey, FL Studio 21 offers the tools and resources to create captivating and immersive soundscapes that resonate with listeners and evoke emotions. Embrace the art of sound design in FL Studio 21, and let the journey of sonic exploration begin.