Proper project organization and planning are vital components of any music production process, and they play a crucial role in maximizing efficiency, creativity, and overall success. Cubase 12, a professional digital audio workstation (DAW), provides a powerful platform for musicians, producers, and engineers to create, edit, and mix music. In this context, effective project organization and planning within Cubase 12 can greatly enhance the workflow and contribute to the realization of artistic vision.
One of the primary benefits of project organization in Cubase 12 is the ability to maintain a structured and intuitive workspace. As music projects tend to involve numerous tracks, plugins, MIDI data, and audio recordings, it is essential to categorize and arrange these elements in a logical manner. Cubase 12 offers features such as track folders, group tracks, and color-coding options, which enable users to group related elements, visually differentiate between different sections, and easily locate specific components within the project. This organization helps users maintain focus, navigate complex arrangements, and reduce clutter, ultimately saving time and minimizing confusion.
Proper project planning is equally crucial, as it allows producers to outline their creative ideas and develop a roadmap for the entire production process. Cubase 12 facilitates this planning phase by providing tools such as the Arranger Track, which allows users to structure their composition in a non-linear fashion. This feature enables the arrangement of sections, intros, verses, choruses, and other elements, allowing for easy experimentation and arrangement changes. By planning the structure of the song in advance, producers can better understand the overall flow and ensure that the final result aligns with their artistic vision.
Additionally, project planning in Cubase 12 involves setting clear goals and milestones, establishing deadlines, and allocating resources effectively. The DAW provides features like the Marker Track and the Project Logical Editor, which enable users to define specific markers, set loop regions, and automate repetitive tasks. These tools aid in managing the project’s timeline, tracking progress, and facilitating collaboration between team members. With a well-defined plan, producers can tackle the project more efficiently, stay organized, and achieve their desired outcomes within the given time frame.
Furthermore, Cubase 12 offers comprehensive project management features that enhance the collaborative aspect of music production. The DAW enables users to export and import project files, making it easier to share projects with other collaborators or work on different aspects of a project on separate systems. With clear project organization and consistent file naming conventions, the process of collaboration becomes smoother, reducing potential conflicts or errors. Proper organization also ensures that any changes or revisions can be implemented seamlessly, without disrupting the overall project structure or losing important data.
In conclusion, project organization and planning are of utmost importance in Cubase 12 for several reasons. They enable users to maintain a structured workspace, navigate complex arrangements, and locate specific elements efficiently. Additionally, project planning allows producers to outline their creative vision, set goals, and allocate resources effectively. With the aid of Cubase 12’s features, such as the Arranger Track, Marker Track, and project management capabilities, users can streamline their workflow, enhance collaboration, and ultimately bring their musical ideas to life with precision and creativity.
Setting up the Project
Setting up a project in Cubase 12 is an essential step in the music production process, as it establishes the foundation for the entire workflow. By properly configuring the project settings, users can optimize their experience within the digital audio workstation (DAW) and ensure seamless compatibility with their creative vision. Here’s a guide on how to set up a project in Cubase 12:
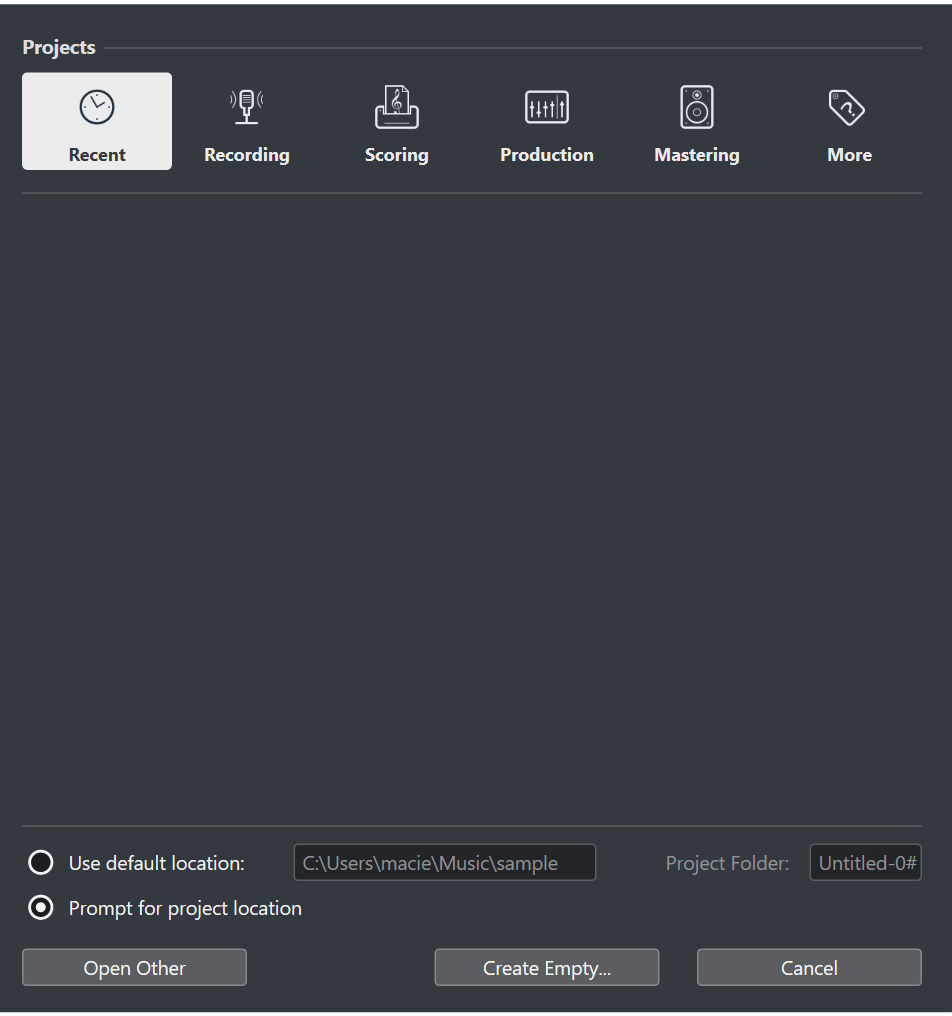
- Launching a New Project:
- Open Cubase 12 and select “New Project” or use the keyboard shortcut (Ctrl/Cmd + N).
- Choose the desired project type, such as empty, template-based, or importing a project.
- Specify the location on your computer where the project will be saved.
- Project Configuration:
- Select the desired sample rate and bit depth for your project. The standard settings are 44.1kHz and 24-bit, but you can adjust them according to your requirements.
- Choose the appropriate time format (bars and beats, timecode, seconds) that suits your workflow.
- Set the tempo of your project by entering the desired BPM (beats per minute).
- Audio and MIDI Setup:
- Configure your audio interface by going to the “Studio” menu and selecting “Studio Setup.”
- Ensure that your audio interface is recognized by Cubase 12 and properly connected to your computer.
- Select the desired inputs and outputs for recording and playback.
- Project Folder Structure:
- Create a well-organized project folder structure to store your audio recordings, MIDI data, samples, and project files.
- Consider creating subfolders for specific elements like audio, MIDI, samples, and plugin presets.
- Naming conventions can also be useful for easily identifying different tracks, files, and versions.
- Track Setup:
- Add tracks to your project based on your needs. Cubase 12 provides a wide range of track types, including audio, MIDI, instrument, and group tracks.
- Configure track parameters such as routing, input/output assignments, and channel settings according to your requirements.
- Set up appropriate track colors or icons for visual organization and differentiation.
- Preferences and Key Commands:
- Customize Cubase 12 preferences to match your workflow and personal preferences. This includes audio, MIDI, and general preferences.
- Set up key commands and shortcuts for frequently used functions to enhance your efficiency and speed up your workflow.
- Saving and Backing Up:
- Regularly save your project as you work on it to prevent any potential data loss.
- Consider setting up automatic backup options within Cubase 12 to create backup files at regular intervals.
- Create a backup of your project folder on an external drive or cloud storage to protect your work from hardware failures or accidents.
By following these steps and properly setting up your project in Cubase 12, you can establish a solid foundation for your music production process. A well-configured project ensures optimal compatibility, improves workflow efficiency, and allows you to focus on the creative aspects of your music without any technical hindrances.