Mixing is the art of combining individual audio elements, such as instruments, vocals, and effects, into a cohesive and balanced whole. It is a crucial step in the music production process, where the raw recordings or virtual instrument tracks are transformed into a polished and professional-sounding composition. A well-executed mix can enhance the clarity, depth, and emotional impact of your music, making it more enjoyable for your listeners.
Cubase 12, the latest iteration of the Cubase software, offers a wealth of features and tools tailored to streamline the mixing process. As an advanced DAW, it provides an intuitive user interface, a vast array of virtual instruments and effects, and comprehensive audio editing capabilities. These tools are designed to assist you in achieving your desired sound and creative vision with ease.
Key Mixing Concepts:
- Channels and Busses: Understanding the difference between audio and instrument channels is crucial. Audio channels typically contain recordings of real instruments or vocals, while instrument channels host virtual instruments and MIDI data. Additionally, busses are used to group multiple channels together, allowing you to apply effects or adjustments collectively.
- Signal Flow: Familiarize yourself with the signal flow within Cubase 12. Learn how audio moves from its source (e.g., audio interface, virtual instrument) through various processing stages (e.g., EQ, compression, reverb) to the final output.
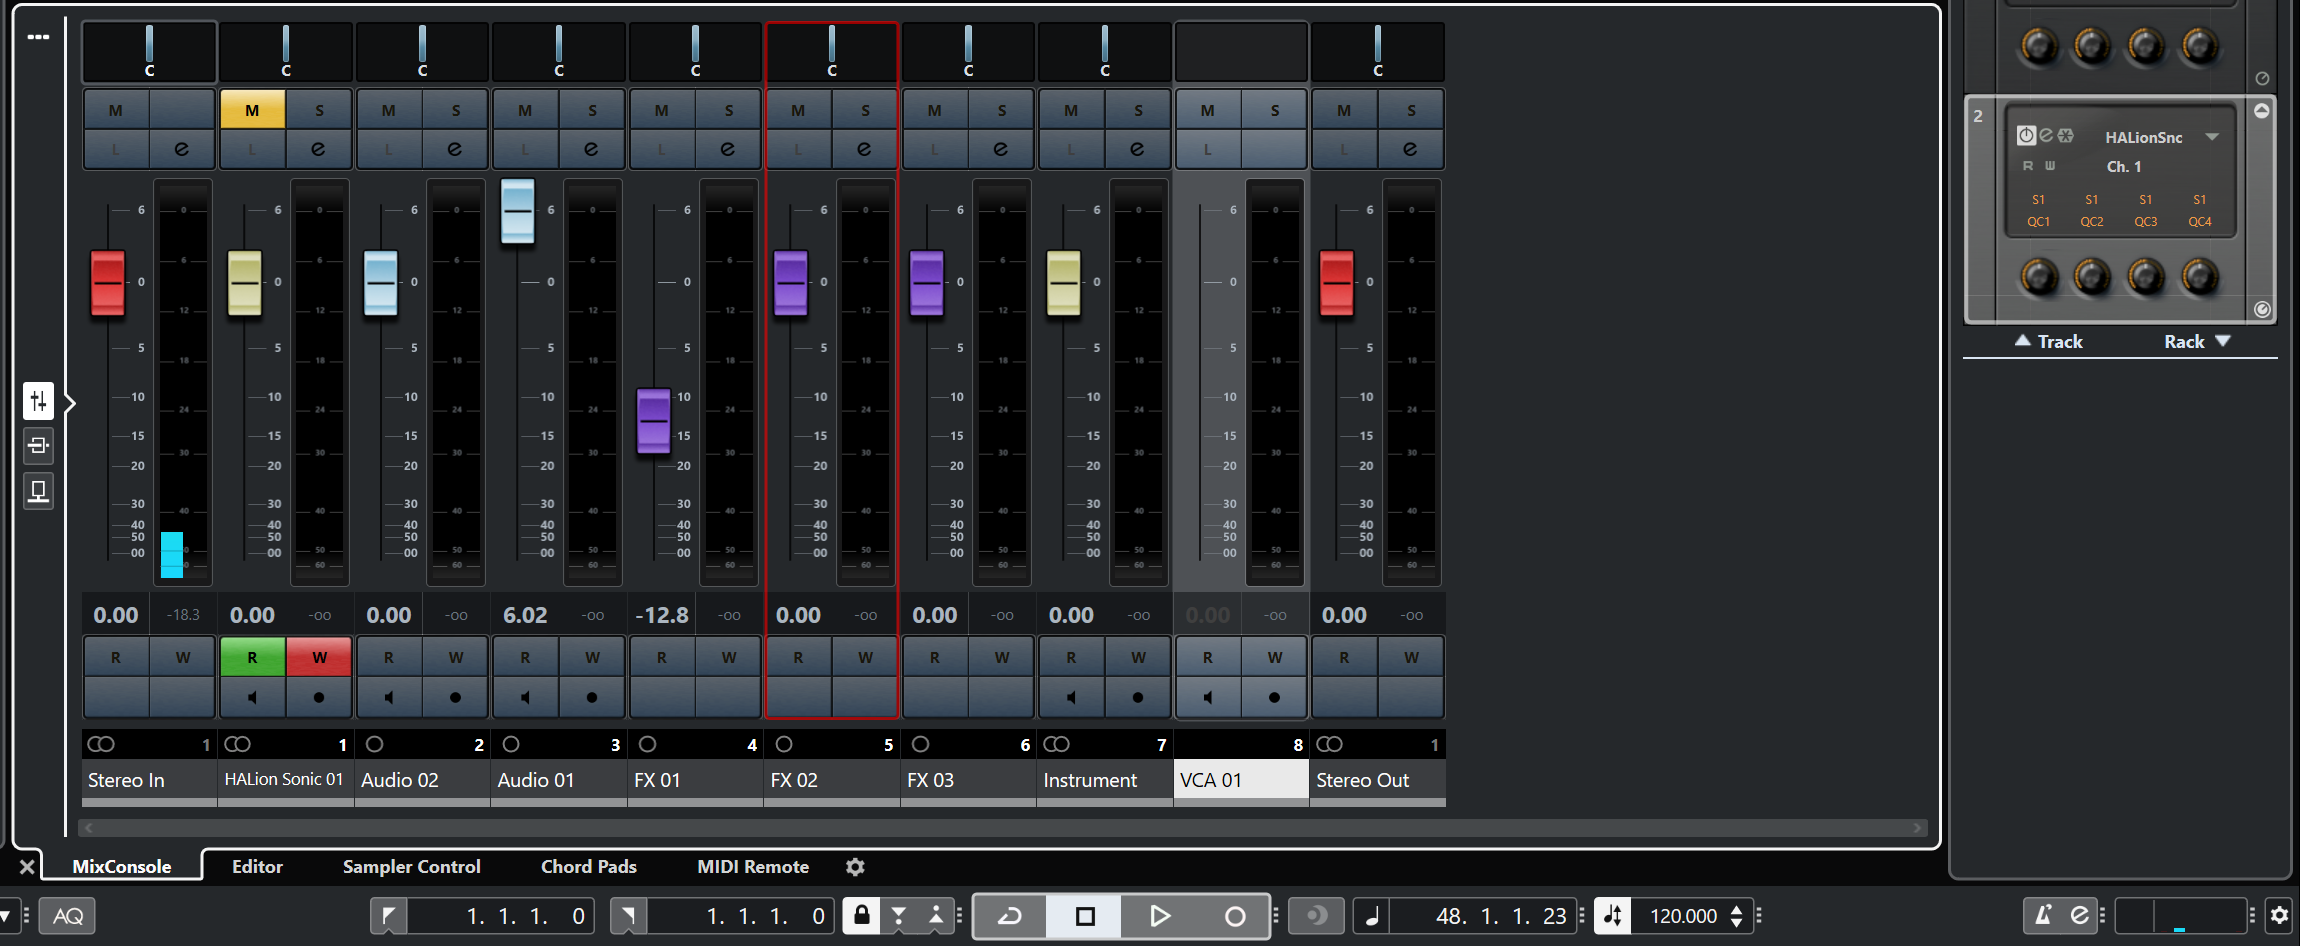
- Mixing Console: The Mixing Console in Cubase 12 is your central hub for controlling individual tracks and their respective settings. Understanding the various elements of the Mixing Console, such as faders, pan knobs, and inserts, is crucial to achieving the desired mix.
- EQ (Equalization): EQ is a fundamental tool used in mixing to balance the frequencies of different elements within a track. Learn how to use Cubase’s built-in EQ plugins to enhance clarity and remove unwanted frequencies.
- Dynamic Processing: Compressors and limiters are used for dynamic processing, controlling the volume levels of tracks and adding punch and character to your mix. Learn how to apply compression effectively to bring out the best in your music.
- Spatial Effects: Reverbs and delays help create a sense of space and depth in your mix. Understanding how to use Cubase’s reverb and delay plugins can give your tracks a sense of realism and ambiance.
- Automation: Automation allows you to control various parameters over time. This feature is essential for adding movement and life to your mix, from subtle volume changes to intricate effects automation.
As you dive into the world of mixing in Cubase 12, remember that practice and experimentation are key. Developing your mixing skills takes time, but the creative possibilities that Cubase offers are endless. Whether you’re a beginner or an experienced producer, the mixing concepts and tools in Cubase 12 can help you elevate your music productions and bring your artistic vision to life.
Understanding Levels
In Cubase, “levels” usually refer to different aspects of audio and MIDI data within a project. Understanding these levels is crucial for efficient music production and mixing. Here are the key levels typically found in Cubase:
- Project Level: This is the highest level in Cubase. It encompasses your entire music production and consists of all the tracks, events, and arrangements you have created. At this level, you can manage your project settings, tempo, key signature, and overall layout.
- Track Level: At the track level, you work with individual tracks, which can be audio, MIDI, instrument tracks, or others. Each track contains specific musical content. For instance, a track could be a vocal recording, a drum loop, or a synthesizer part. At this level, you can apply various processing effects, adjust volume, panning, and other parameters to fine-tune the individual tracks.
- Event Level: Events are the building blocks of tracks. They represent individual audio or MIDI segments within a track. For audio tracks, an event might be a vocal phrase or a drum hit, while for MIDI tracks, it could be a single note or a chord. You can manipulate events to edit and arrange your music precisely.
- MIDI Note Level: When working with MIDI tracks, you can access the MIDI note level to make adjustments to individual notes within a MIDI event. This allows you to alter note lengths, velocities, pitch, and other MIDI parameters.
- Mix Level: The mix level is where you bring all the tracks together to create a balanced and cohesive sound. At this level, you use the mixer to adjust the volume, pan, and apply various effects and processing to the individual tracks, shaping the final sound of your project.
- Mastering Level: This is the final stage of the production process. Here, you optimize the overall sound of your mix by applying mastering plugins and making subtle adjustments to ensure the final output is polished and ready for distribution.
Understanding these levels in Cubase allows you to work more efficiently and creatively throughout the music production process. Each level offers specific tools and features to manipulate and refine your music, from the initial idea to the polished final product. As Cubase continues to evolve, there may be new features and enhancements, but the core concept of working with different levels to manage your project will likely remain consistent.
Panning Techniques
Panning is a fundamental technique used in audio mixing to position audio signals within the stereo field. It allows you to create a sense of space and depth in your mix by placing individual audio elements in different positions between the left and right speakers. In Cubase, you have various panning options to achieve this effect:
- Balance Panning: The simplest panning technique is balance panning, where you adjust the pan knob of a track to position the sound either to the left, right, or center of the stereo field. This technique is useful for creating a clear separation between different elements in your mix.
- Automation: Cubase allows you to automate panning, which means you can change the pan position of a track over time. By automating panning, you can create dynamic movement of sound, making it appear as if the audio source is moving from one side to the other, or even creating complex circular panning patterns.
- Stereo Pan Modes: In Cubase, you have different pan modes available. The most common ones are “Stereo Balance” and “Stereo Dual Panner.” Stereo Balance provides a simple balance panning control, while Stereo Dual Panner lets you adjust the pan position independently for the left and right channels. This allows for more precise control over the stereo image.
- Surround Panning: For projects with surround sound formats (e.g., 5.1 or 7.1), Cubase offers surround panning options. This allows you to position audio in a three-dimensional space, not only left to right but also front to back.
- Channel Linking: Cubase enables you to link the panning of multiple tracks together. By linking tracks, you can control their panning simultaneously, maintaining their relative positions in the stereo field as you adjust them.
- Panning Law: Cubase also lets you choose different panning laws, which determine how the audio level changes when you pan a signal. The commonly used options are linear and constant power. The choice of panning law can affect the perceived loudness when panning.
Experimenting with different panning techniques in Cubase can significantly enhance your mix and add spatial interest to your music. It is essential to use panning creatively and thoughtfully to create a well-balanced and immersive listening experience for your audience. As Cubase continues to evolve, you may encounter additional panning features and improvements in Cubase 12 that further enhance your mixing capabilities.
Achieving Balance
Achieving balance in Cubase refers to the process of ensuring that all the elements in your mix blend together harmoniously and that no single instrument or track dominates the overall sound. Proper balance is essential for a well-mixed and polished music production. Here are some techniques and tools available in Cubase to help you achieve balance:
- Volume and Fader Control: The most basic method to achieve balance is by adjusting the volume levels of individual tracks using the faders in the Cubase mixer. Lower the volume of tracks that sound too loud or overpowering and raise the volume of tracks that need more presence in the mix.
- Panning: As mentioned in the previous response, panning allows you to position audio signals in the stereo field. By panning tracks appropriately, you can create a sense of space and separation in your mix, preventing overcrowding of sounds in the center and providing a more immersive listening experience.
- Equalization (EQ): Use Cubase’s EQ plugins to shape the frequency content of each track. By removing unnecessary frequencies and enhancing the desired ones, you can prevent frequency clashes between different instruments and ensure each element has its sonic space in the mix.
- Compression: Compression helps control the dynamic range of a track, making loud parts quieter and quiet parts louder. By applying compression to individual tracks, you can even out the volume fluctuations, resulting in a more balanced mix.
- Grouping and Submixing: Cubase allows you to group tracks together and apply processing to multiple tracks simultaneously. Grouping related instruments (e.g., drums, backing vocals) and applying processing to the group can help maintain a cohesive balance across the related elements.
- Automation: Utilize automation in Cubase to create dynamic changes in volume and other parameters over time. By automating volume levels, pan positions, or any other parameter, you can add movement and interest to the mix, achieving a more balanced and engaging result.
- Reference Tracks: Import reference tracks into your Cubase project from songs that have a similar style or sound you want to achieve. Use them as a guide to compare your mix and help you make adjustments to achieve a similar balance.
- Spectrum Analyzers: Cubase offers spectrum analyzers that display the frequency content of your mix. Use these visual tools to identify any frequency buildup or clashes, helping you make targeted EQ adjustments to achieve a better balance.
Remember, achieving balance is an iterative process. Continuously listen to your mix, make adjustments, and compare your work to professional references to ensure you’re on the right track. With the powerful tools and features available in Cubase 12 (whenever it is released), you will have even more options and enhancements to assist you in achieving a balanced and professional mix.
Advanced Mixing Features in Cubase 12
- Enhanced Channel Strips: Cubase 12 could feature an improved channel strip with more versatile and customizable modules, such as dynamic EQs, multiband compressors, and advanced saturation controls. This would give users more options to sculpt the sound of each track with precision.
- AI-driven Mixing Assistance: With the advancements in AI technology, Cubase 12 might include AI-driven mixing assistance tools. These tools could analyze your mix and offer suggestions or even automatically apply corrective measures to improve the overall balance and sound quality.
- Advanced Automation Editing: Cubase 12 could introduce more intuitive and powerful automation editing capabilities. This might include curve-based automation, automation presets, and the ability to edit automation in multiple lanes simultaneously, making it easier to craft complex automation patterns.
- Spatial Audio and Immersive Mixing: With the increasing popularity of spatial audio formats like Ambisonics and Dolby Atmos, Cubase 12 might include native support for immersive mixing. This could allow producers to create 3D audio experiences by positioning sounds in a spherical sound space.
- Real-time Collaboration: Collaborative features might be enhanced in Cubase 12, allowing multiple users to work on the same project simultaneously, streamlining the collaborative mixing process and promoting seamless communication.
- Advanced Sidechaining Options: Cubase 12 could offer more sophisticated sidechain routing options, enabling users to trigger various parameters and effects based on external input signals, expanding the creative possibilities of mixing.
- Mix Console Customization: Cubase 12 might introduce further customization options for the mix console, allowing users to tailor the layout and appearance to their preferences, improving workflow efficiency.
- Visual Mixing Tools: Cubase 12 could include improved visual tools like spectral analyzers, phase meters, and metering options, giving users more insights into their mix and helping them make informed decisions during the mixing process.
- Virtual Analog Summing: Cubase 12 might offer a virtual analog summing feature, emulating the sound of analog summing mixers, enhancing the warmth and character of the mix.
Conclusion
Understanding levels allows users to control the volume of individual tracks and shape the dynamic range of their project. With precise control over each element’s volume, users can ensure that no track overpowers others, resulting in a cohesive and polished mix.
Panning in Cubase 12 permits the placement of audio signals within the stereo field, adding depth and spatial interest to the mix. By positioning elements strategically between the left and right channels, producers can create a sense of movement and space, further enhancing the listener’s experience.
Achieving balance in Cubase 12 is essential for ensuring that all elements harmoniously blend together. Through the manipulation of volume levels, panning positions, and using advanced tools like EQ, compression, and automation, users can create a balanced mix where each instrument occupies its sonic space and contributes to the overall sound cohesively.
As Cubase continues to evolve and new versions like Cubase 12 are released, we can expect further advancements in mixing features, possibly including AI-driven assistance, immersive audio capabilities, and enhanced automation tools, among others. Embracing these cutting-edge features while adhering to the fundamental mixing concepts of levels, panning, and balance will undoubtedly lead to captivating and professional audio productions within Cubase 12. Whether you are a seasoned professional or a beginner in music production, understanding these concepts and utilizing the tools in Cubase 12 will empower you to create music that captivates and engages your audience.