Understanding the interface and navigation of any digital audio workstation (DAW) is crucial for achieving an efficient workflow, and FL Studio 21 is no exception. FL Studio is a popular DAW used by musicians, producers, and composers for creating music, and it offers a wide range of features and tools. Mastering its interface and navigation can significantly enhance productivity and creativity. Here are some key reasons why understanding the interface and navigation is essential in FL Studio 21:
- Streamlined Workflow: FL Studio 21 has a vast array of features, instruments, and effects. Without a good understanding of the interface, it’s easy to get lost and spend valuable time searching for tools or options. Familiarizing yourself with the layout and organization of the DAW will enable you to access the necessary tools quickly, thereby streamlining your workflow and allowing you to focus more on the creative process.
- Optimal Tool Utilization: A comprehensive knowledge of the interface ensures that you can use all the available tools efficiently. You’ll be able to harness the power of various virtual instruments, plugins, and effects effectively, without being hindered by a lack of understanding.
- Quick Project Navigation: FL Studio projects can become quite complex, with multiple tracks, patterns, and automation clips. Understanding the navigation tools and shortcuts will enable you to move around the project swiftly, making editing, arranging, and mixing tasks more manageable.
- Improved Creativity: When you are not preoccupied with trying to find your way around the software, your mind is free to be more creative. Understanding the interface allows you to work seamlessly, enabling you to capture ideas as they come and explore different musical possibilities without interruption.
- Efficient Editing: Editing is an integral part of music production, and FL Studio offers a wide range of editing capabilities. Knowing how to use the various editing tools and features will make the editing process quicker and more accurate.
- Customization and Personalization: FL Studio 21 allows for a considerable degree of customization. Understanding the interface will enable you to personalize the layout, create custom templates, and set up your preferred workflow, tailored to your specific needs and preferences.
- Seamless Collaboration: If you collaborate with other musicians or producers, having a good understanding of FL Studio’s interface ensures that you can communicate and work together efficiently. It reduces the chances of misunderstandings or compatibility issues when sharing project files.
- Efficient Recording: For those who record audio or MIDI within FL Studio, a solid grasp of the interface is essential for setting up recording sessions, managing inputs and outputs, and monitoring during the recording process.
- Troubleshooting and Tech Support: In case you encounter any issues or bugs, understanding the interface will help you troubleshoot problems more effectively. It also allows you to articulate any technical difficulties you might encounter to tech support or online communities, making it easier to find solutions.
Understanding the interface and navigation in FL Studio 21 is vital for maximizing your productivity, creativity, and overall enjoyment of the software. Whether you are a beginner or an experienced user, investing time in learning and mastering the DAW’s interface will undoubtedly pay off in the long run, as you’ll be able to work more efficiently and produce music at a higher level.

Understanding the Toolbar
The Toolbar in FL Studio 21 is a crucial element of the user interface that provides quick access to various essential functions and tools. Located at the top of the main window, the Toolbar is a collection of buttons and controls that streamline workflow and navigation within the digital audio workstation (DAW). Understanding the different components of the Toolbar is fundamental to efficiently harnessing the power of FL Studio and enhancing the music production experience. Let’s explore some of the key elements found in the Toolbar:
- Transport Controls: At the leftmost side of the Toolbar, you’ll find the transport controls, which include the play, stop, pause, and record buttons. These are used for basic playback and recording operations. You can also find the tempo and time signature settings in this section.
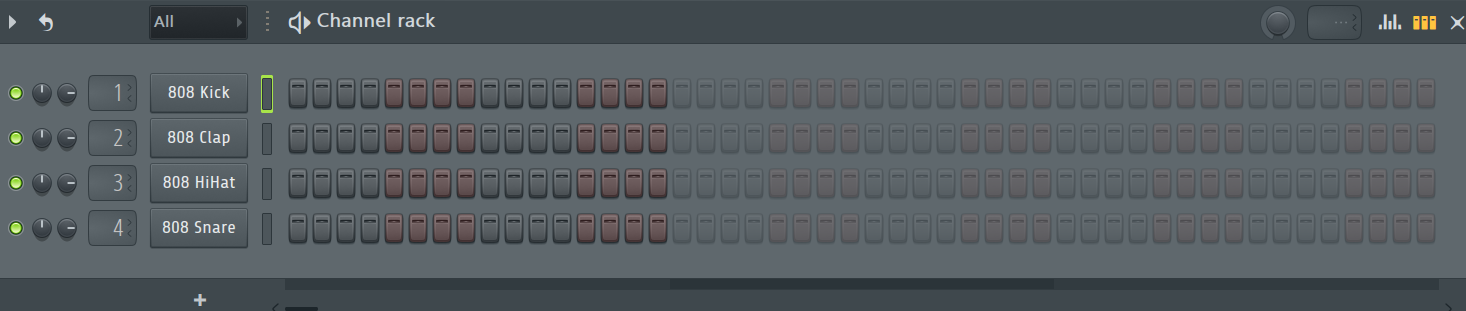
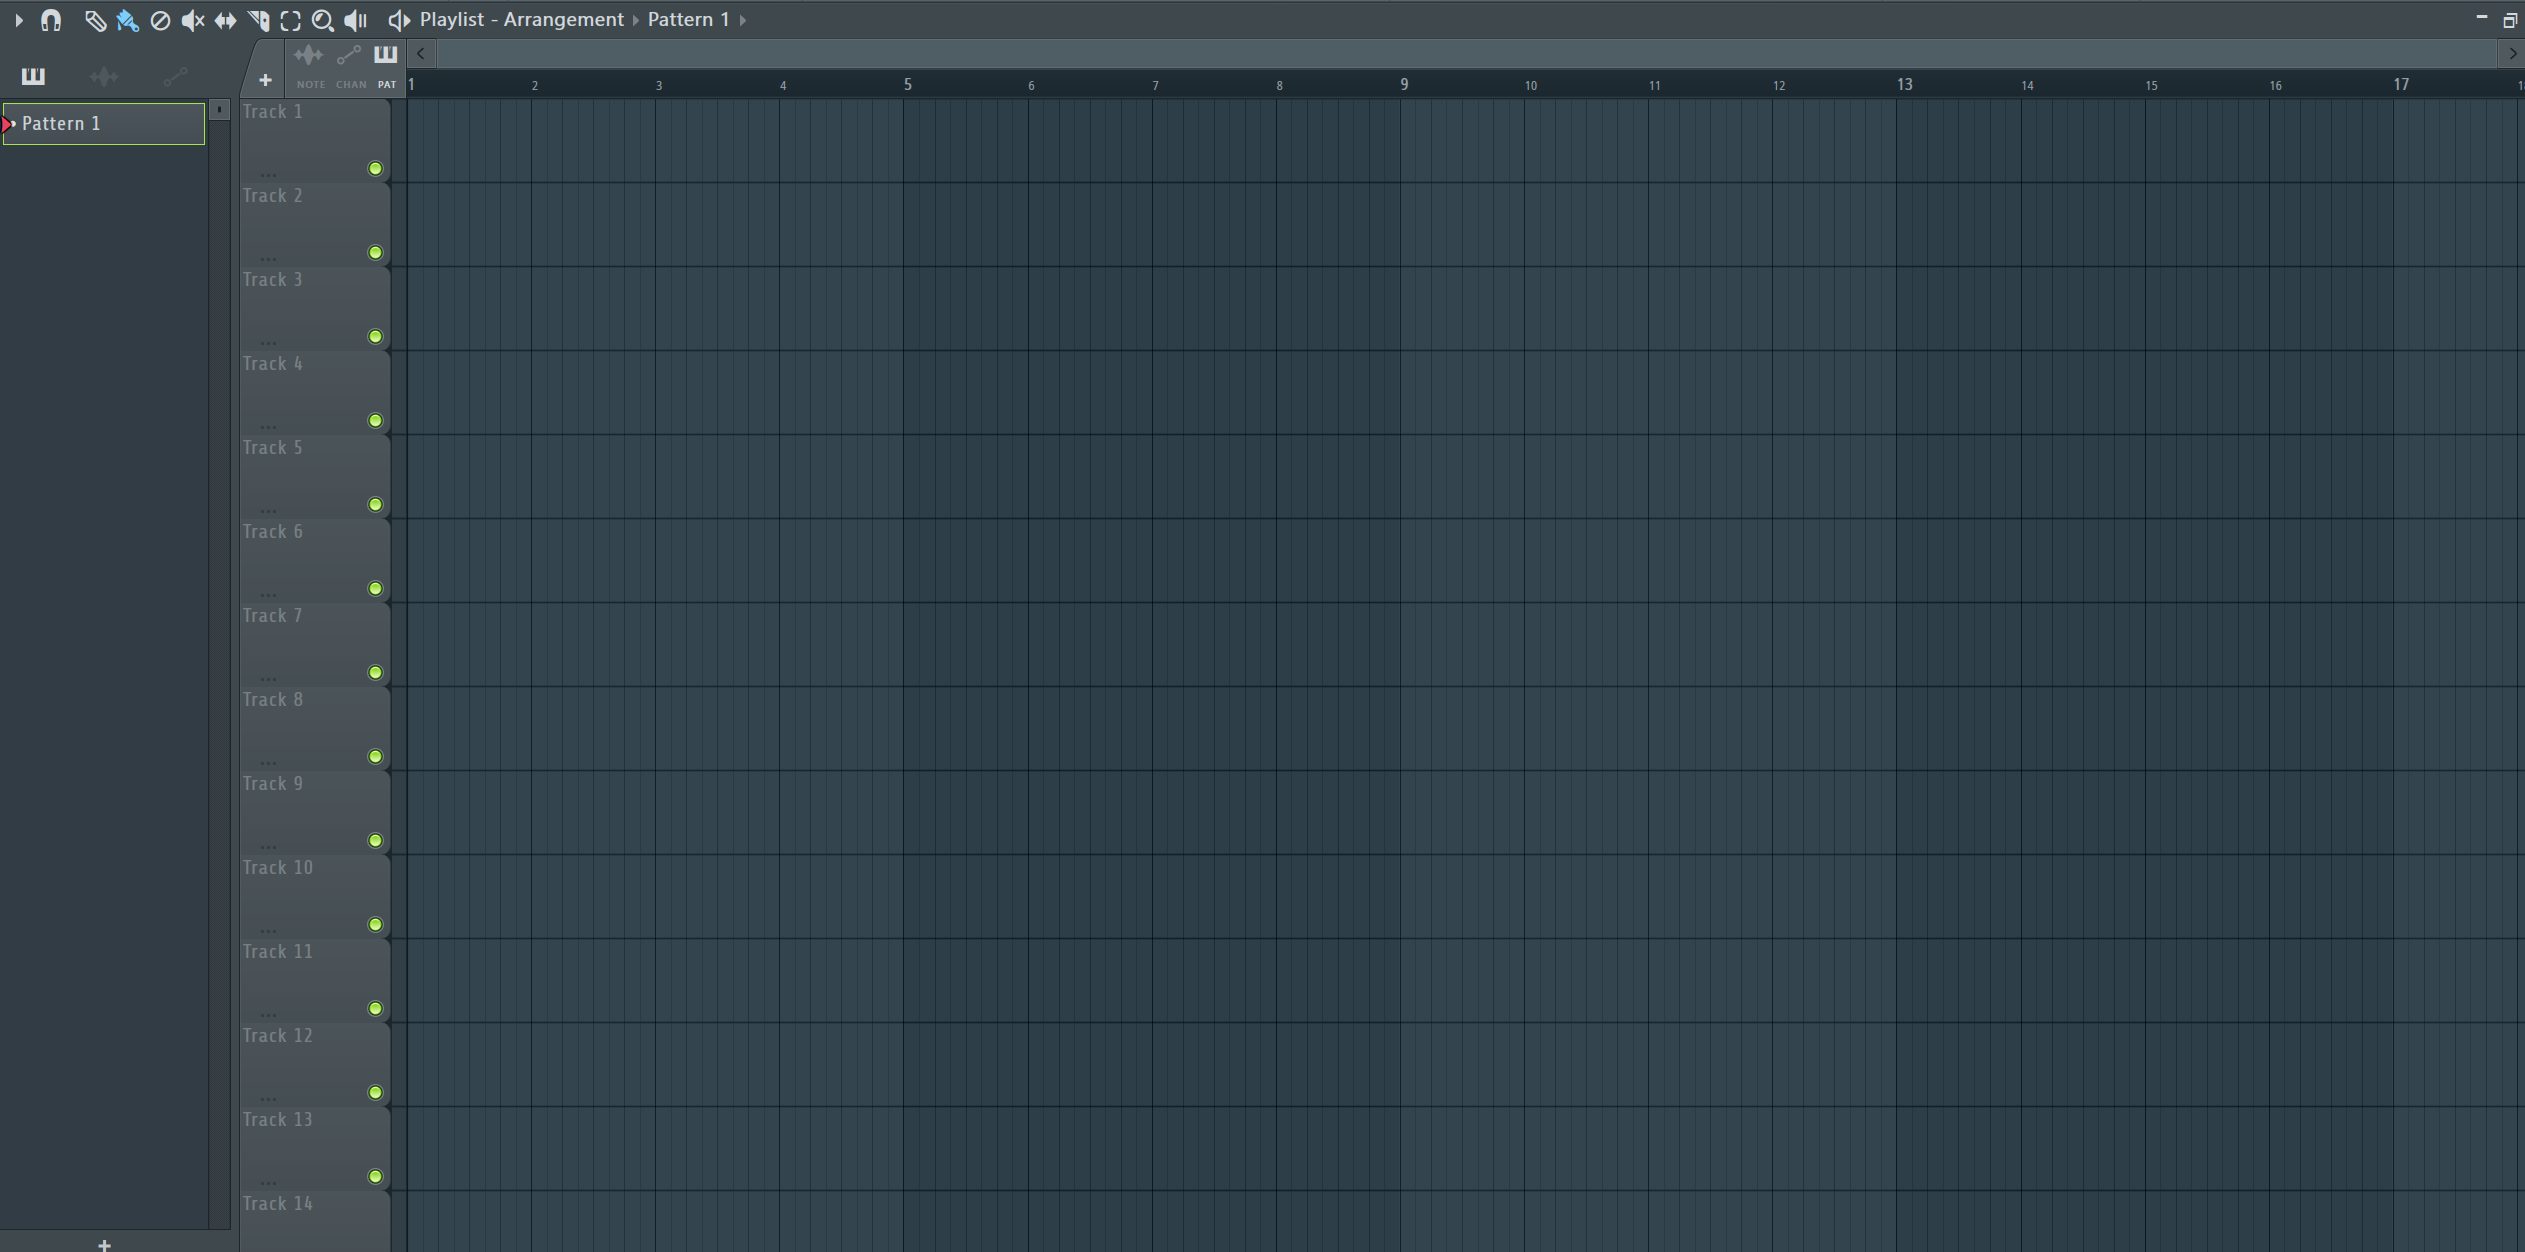
- Step Sequencer and Playlist Buttons: The Toolbar provides quick access to the Step Sequencer and Playlist views. You can toggle between these two main work areas of FL Studio with the Step Sequencer and Playlist buttons. The Step Sequencer is where you create and arrange patterns for instruments, while the Playlist is where you arrange and organize these patterns into a full composition.
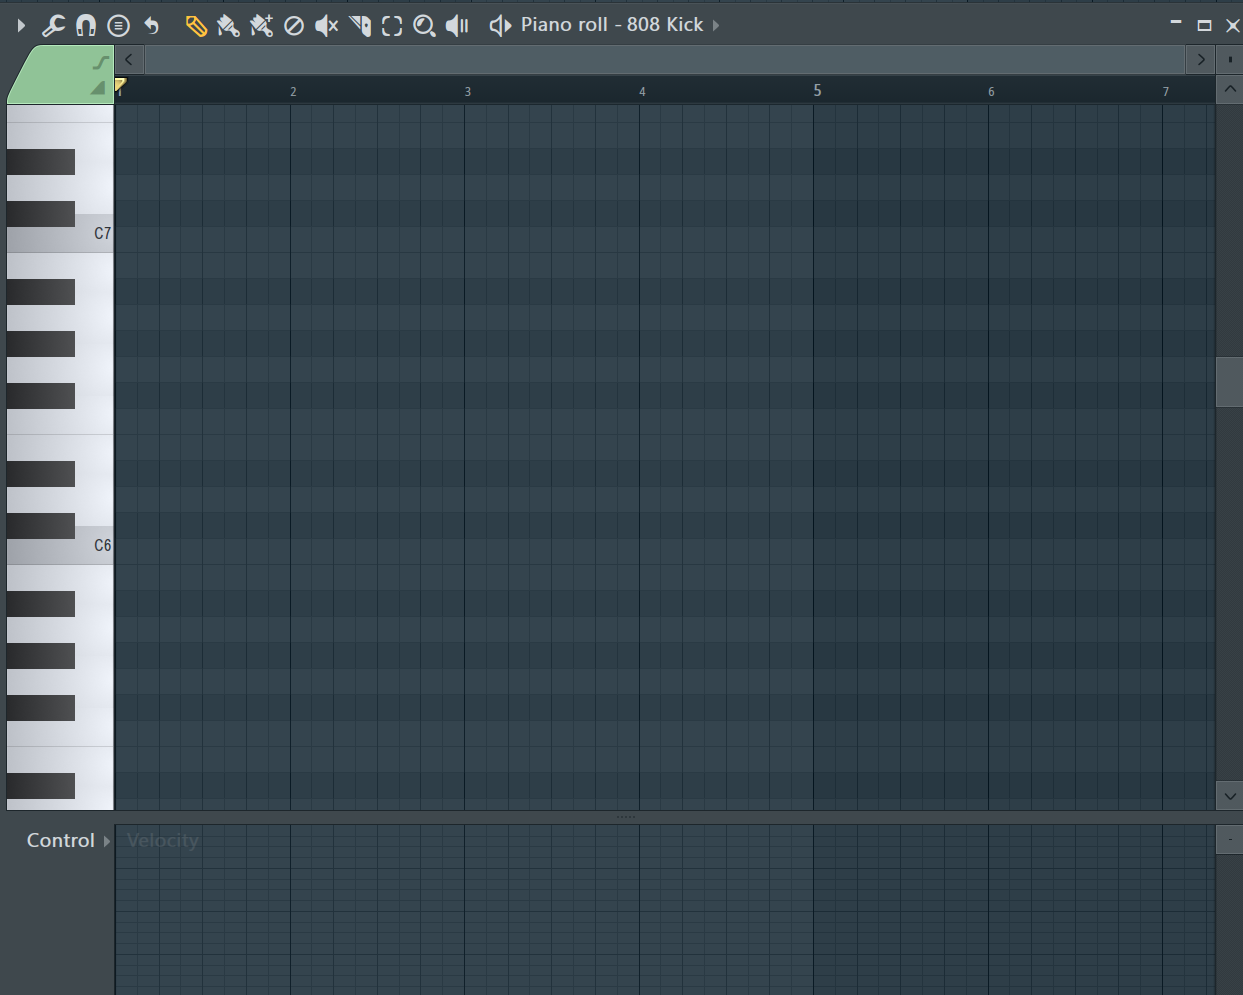
- Piano Roll and Event Editor Buttons: To the right of the Toolbar, you’ll find the buttons for accessing the Piano Roll and Event Editor. The Piano Roll is used for editing MIDI data, such as note placements, velocities, and lengths. The Event Editor allows for more precise control over MIDI events and is useful for fine-tuning automation and controller data.
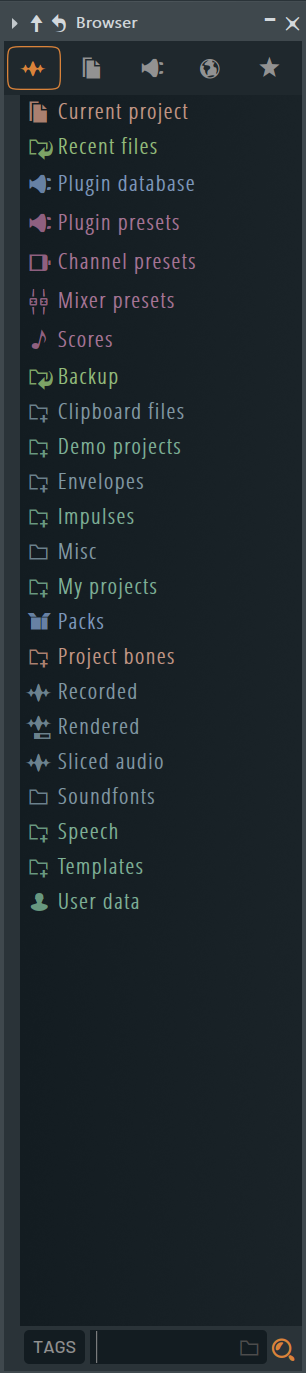
- Browser and Plugin Picker: The Browser button opens the Browser panel, which is used for browsing and organizing files, samples, presets, and plugins. The Plugin Picker button provides quick access to your favorite plugins and instruments, allowing you to search and load them efficiently.
- Mixer and Mixer Routing: The Mixer button opens the Mixer view, where you can adjust the volume, panning, and effects of individual tracks. The Mixer Routing button allows you to quickly route tracks to various mixer tracks and buses.
- Automation and Recording Options: The Automation button activates the automation mode, enabling you to record and edit automation data for various parameters. The Recording Options button gives you control over various recording settings, such as input selection and metronome options.
- Tools and Snap Settings: The Tools button provides access to various editing and manipulation tools, such as the paintbrush, pencil, and selection tool. The Snap Settings button allows you to enable or disable snap and set the snap grid resolution for precise editing.
- Help and Project Information: The Help button provides access to FL Studio’s help documentation and online resources. The Project Information button displays important details about the current project, such as its title, author, and copyright information.
Understanding each of these elements in the Toolbar empowers users to work efficiently and access the necessary functions with ease. As with any software, learning the shortcuts and workflows associated with the Toolbar can significantly enhance productivity and creativity in FL Studio 21, making the music production process smoother and more enjoyable.
Overview of the main interface components
FL Studio 21 boasts a comprehensive and user-friendly interface designed to cater to musicians, producers, and composers of all levels. Understanding the main interface components is crucial for a smooth and efficient music production workflow. Let’s take a closer look at the key elements of the FL Studio 21 interface:
Title Bar: The Title Bar is located at the very top of the interface and displays the name of the current project. It also contains the minimize, maximize, and close buttons for window management.

Toolbar: The Toolbar, as discussed in the previous response, is located just below the Menu Bar and provides quick access to transport controls, sequencer views, editing tools, mixer settings, and more.

Browser Panel: The Browser Panel is situated on the left side of the interface. It serves as a central hub for organizing and accessing files, samples, plugins, presets, and project assets. The Browser allows users to quickly search, preview, and drag-and-drop items into the Playlist or Step Sequencer.
Step Sequencer: The Step Sequencer is a grid-based sequencer located in the center of the interface. It is used for creating and arranging musical patterns for instruments and samples. Each row in the Step Sequencer represents a different instrument, and users can draw or program patterns using the available notes and steps.
Playlist: The Playlist is positioned to the right of the Step Sequencer. It is the main area where users arrange and organize patterns from the Step Sequencer to create a complete composition. Here, you can stack patterns, add automation clips, and control the overall structure of your music.
Piano Roll: The Piano Roll is a versatile MIDI editor accessible from the Step Sequencer or Playlist. It allows users to edit and manipulate MIDI data in a piano roll-style grid, making it easy to adjust note positions, lengths, velocities, and more.
Mixer: The Mixer is located at the bottom of the interface and is used for controlling the volume, panning, and effects of individual tracks. Each track in the Playlist corresponds to a mixer channel, allowing for precise control over the audio mix.

FL Studio 21’s interface is highly customizable, allowing users to adjust the layout, size, and visibility of various components to suit their preferences and working style. Familiarizing oneself with these main interface components empowers users to navigate the DAW efficiently and maximize their creativity during the music production process.
Conclusion
Understanding the interface and navigation in FL Studio 21 is paramount for a seamless and productive music production experience. FL Studio is a powerful digital audio workstation that offers a vast array of features and tools to help musicians and producers bring their creative visions to life. By mastering the interface and navigation, users can efficiently harness the full potential of the software, streamline their workflow, and enhance their overall productivity.
A comprehensive knowledge of the Toolbar allows for quick access to essential functions and tools, enabling users to focus more on the creative process and less on searching for options. The main interface components, such as the Step Sequencer, Playlist, Piano Roll, and Mixer, are the core work areas of FL Studio. Understanding how to navigate and utilize these components effectively empowers users to arrange, edit, and mix their music with precision and ease.
Moreover, a deep familiarity with the Browser panel helps users stay organized by efficiently managing files, samples, presets, and plugins. The ability to customize the interface to suit individual preferences enhances user comfort and promotes a personalized workflow tailored to specific needs.
By grasping the interface and navigation, collaboration with other musicians and producers becomes smoother, as it reduces compatibility issues and streamlines communication. Furthermore, it facilitates troubleshooting and technical support, making it easier to address any challenges that arise during the music production journey.
Ultimately, a solid understanding of the interface and navigation in FL Studio 21 empowers users to unlock their creativity and fully immerse themselves in the art of music production. It allows them to transform ideas into fully realized compositions efficiently, fostering a rewarding and inspiring creative process. Whether one is a beginner or a seasoned professional, investing time in mastering FL Studio’s interface and navigation is a worthwhile endeavor, paving the way for musical innovation and artistic expression.